Installation of 11.2.0.2 on Oracle Solaris 10u9
This article will be useful for Installation of Oracle 11.2.0.2 on Latest available Oracle Soalris Update 9
Note: 11.2.0.2 (10098816) patchset comes with complete Installation. For this release we need not have to Install base release 11.2.0.1 software. The base release software is already included in software.
Steps for Installation:
1) Donwload patchset 10098816 from http://support.oracle.com
File Size
p10098816_112020_SOLARIS64_1of7.zip 1.4G (1424340471 bytes) Download
p10098816_112020_SOLARIS64_2of7.zip 1.0G (1069940891 bytes) Download
p10098816_112020_SOLARIS64_3of7.zip 918M (963322837 bytes) Download
p10098816_112020_SOLARIS64_4of7.zip 674M (707499195 bytes) Download
p10098816_112020_SOLARIS64_5of7.zip 621M (651345204 bytes) Download
p10098816_112020_SOLARIS64_6of7.zip 483M (506870319 bytes) Download
p10098816_112020_SOLARIS64_7of7.zip 138M (144770887 bytes) Download
The first two files contains RDBMS Software.
2) Unzip the files in a stage area.
3) Perform all pre-requisite steps
In Oracle Solaris 10 9/10 s10s_u9wos_14a SPARC u need not have to Install any additional patches and packages.
Need to configure shmmax variable, this can be done with the following commnad:
bash-3.00#projadd -U ora11g -K "project.max-shm-memory=(priv,8192MB,deny)" user.ora11g
Bounce the Server (init 6)
Some other new kernel parameters are added for 11.2.0.2 patchset Instalaltion. For setting these kernel parameter use below commands:
bash-3.00# ndd -set /dev/udp udp_smallest_anon_port 9000
bash-3.00# ndd -set /dev/udp udp_largest_anon_port 65500
bash-3.00# ndd -set /dev/tcp tcp_smallest_anon_port 9000
bash-3.00# ndd -set /dev/tcp tcp_largest_anon_port 65500
For more Information on setting these parameters please refer:
http://appsdbaworkshop.blogspot.com/2010/09/oracle-database-11202-tcp-and-udp-new.html
add oracle user and group:
bash-3.00#groupadd dba
bash-3.00#useradd -g dba -d /home/ora11g -m ora11g
change directory privileges and ownership:
bash-3.00#chmod -R 775 /u01/11g_Home
bash-3.00#chown -R ora11g:dba /u01/11g_Home
Set environment variables in bash profile or any other .env file:
ORACLE_SID=db1; export ORACLE_SID
ORACLE_BASE=/u01/11g_home; export ORACLE_BASE
ORACLE_HOME=$ORACLE_BASE/11.2.0.2; export ORACLE_HOME
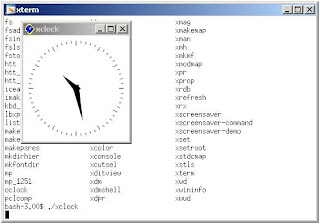
Login to sever with xwindow software and set the proper display.
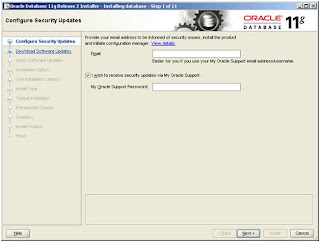
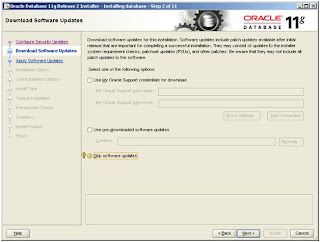
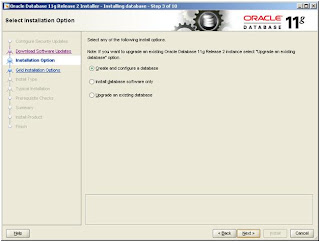
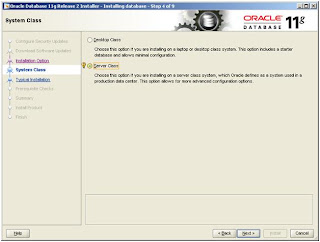
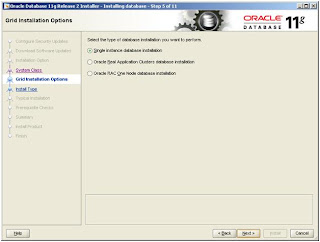
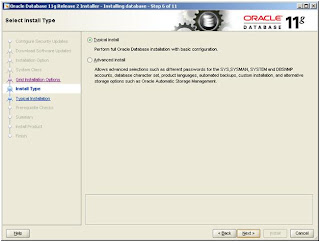
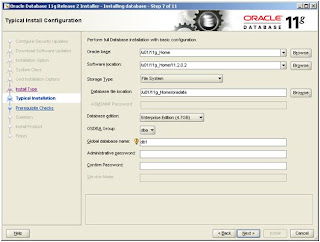
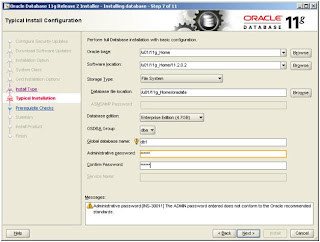
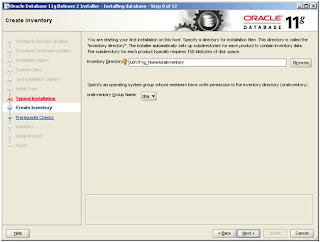
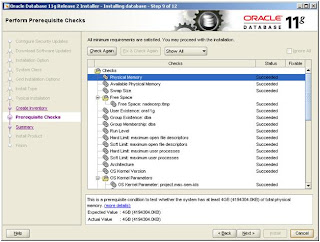
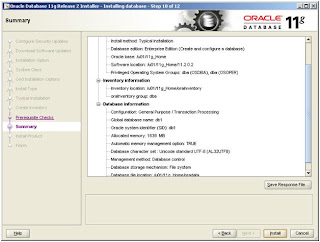
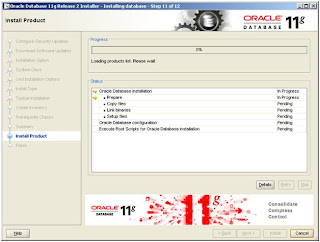
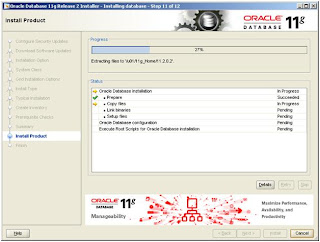
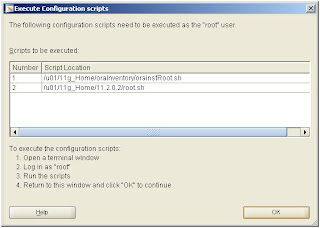
4) Install the Oracle software:
-> Run Installer from 11.2.0.2 stage area
Follow one by one Installation steps.


Note: 11.2.0.2 (10098816) patchset comes with complete Installation. For this release we need not have to Install base release 11.2.0.1 software. The base release software is already included in software.
Steps for Installation:
1) Donwload patchset 10098816 from http://support.oracle.com
File Size
p10098816_112020_SOLARIS64_1of7.zip 1.4G (1424340471 bytes) Download
p10098816_112020_SOLARIS64_2of7.zip 1.0G (1069940891 bytes) Download
p10098816_112020_SOLARIS64_3of7.zip 918M (963322837 bytes) Download
p10098816_112020_SOLARIS64_4of7.zip 674M (707499195 bytes) Download
p10098816_112020_SOLARIS64_5of7.zip 621M (651345204 bytes) Download
p10098816_112020_SOLARIS64_6of7.zip 483M (506870319 bytes) Download
p10098816_112020_SOLARIS64_7of7.zip 138M (144770887 bytes) Download
The first two files contains RDBMS Software.
2) Unzip the files in a stage area.
3) Perform all pre-requisite steps
In Oracle Solaris 10 9/10 s10s_u9wos_14a SPARC u need not have to Install any additional patches and packages.
Need to configure shmmax variable, this can be done with the following commnad:
bash-3.00#projadd -U ora11g -K "project.max-shm-memory=(priv,8192MB,deny)" user.ora11g
Bounce the Server (init 6)
Some other new kernel parameters are added for 11.2.0.2 patchset Instalaltion. For setting these kernel parameter use below commands:
bash-3.00# ndd -set /dev/udp udp_smallest_anon_port 9000
bash-3.00# ndd -set /dev/udp udp_largest_anon_port 65500
bash-3.00# ndd -set /dev/tcp tcp_smallest_anon_port 9000
bash-3.00# ndd -set /dev/tcp tcp_largest_anon_port 65500
For more Information on setting these parameters please refer:
http://appsdbaworkshop.blogspot.com/2010/09/oracle-database-11202-tcp-and-udp-new.html
add oracle user and group:
bash-3.00#groupadd dba
bash-3.00#useradd -g dba -d /home/ora11g -m ora11g
change directory privileges and ownership:
bash-3.00#chmod -R 775 /u01/11g_Home
bash-3.00#chown -R ora11g:dba /u01/11g_Home
Set environment variables in bash profile or any other .env file:
ORACLE_SID=db1; export ORACLE_SID
ORACLE_BASE=/u01/11g_home; export ORACLE_BASE
ORACLE_HOME=$ORACLE_BASE/11.2.0.2; export ORACLE_HOME
Login to sever with xwindow software and set the proper display.
4) Install the Oracle software:
-> Run Installer from 11.2.0.2 stage area
Follow one by one Installation steps.


Comments