Creating ASM Disk Group in 11gR2 on Oracle Solaris 10
Three Simple Steps for creating ASM Disk group from 11gr2 on Solaris 10 Sparc platform.
This post is to illustrate creation of ASM DISK GROUP in 11gR2 on Solaris 10-Sparc on a standalone Installation of 11gR2 Grid Infrastructure.
Steps:
Step 1
Install 11gR2 GRID Infrastructure software in a separate home than you oracle RDBMS software home.
Step 2
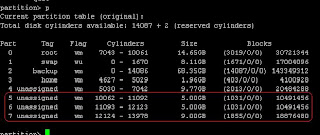
configure (or) prepare your raw devices:
I have configured 3 partition to be used in ASM DG as shown below.
- change privileges and ownership of RAW devices
Here ora11g is is the owner of 11gR2 Grid Infrastructure home.
Step 3
use ASMCA GUI Interface for creating ASM Disk groups:
- Set ORACLE_HOME, PATH variable to Grid Infra home location.
- Make sure proper DISPLAY variable is configured.
- run command asmca
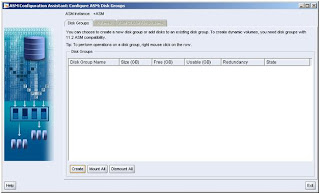
click on "create"
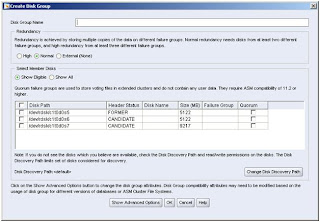
Here it should discover all raw devices which was configured in previous step
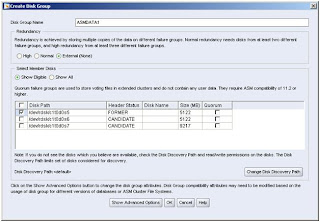
Select any one of the Disk with "external" redundancy and click "OK"
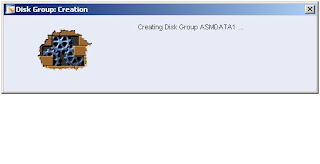
Creation of Disk Group completed Successfully, now you can use this Disk group for all your oracle storage requirements.
This post is to illustrate creation of ASM DISK GROUP in 11gR2 on Solaris 10-Sparc on a standalone Installation of 11gR2 Grid Infrastructure.
Steps:
Step 1
Install 11gR2 GRID Infrastructure software in a separate home than you oracle RDBMS software home.
Step 2
configure (or) prepare your raw devices:
I have configured 3 partition to be used in ASM DG as shown below.

- change privileges and ownership of RAW devices
bash-3.00# chmod -R 775 /dev/rdsk/c1t0d0s5
bash-3.00# chmod -R 775 /dev/rdsk/c1t0d0s6
bash-3.00# chmod -R 775 /dev/rdsk/c1t0d0s7

bash-3.00# chown -R ora11g:dba /dev/rdsk/c1t0d0s5
bash-3.00# chown -R ora11g:dba /dev/rdsk/c1t0d0s6
bash-3.00# chown -R ora11g:dba /dev/rdsk/c1t0d0s7
Here ora11g is is the owner of 11gR2 Grid Infrastructure home.
Step 3
use ASMCA GUI Interface for creating ASM Disk groups:
- Set ORACLE_HOME, PATH variable to Grid Infra home location.
- Make sure proper DISPLAY variable is configured.
- run command asmca

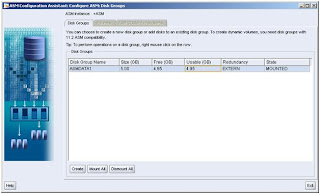
click on "create"

Here it should discover all raw devices which was configured in previous step

Select any one of the Disk with "external" redundancy and click "OK"


Creation of Disk Group completed Successfully, now you can use this Disk group for all your oracle storage requirements.

Comments