11gR2 RAC on Linux 5.6 using VmWare Server 2.02 on Windows 7
Installation, configuration of 4 Node 11gR2 RAC
The article below is my personal experience for Installing, configuring and creating a 4 Node 11gR2 (11.2.0.1) RAC database on Oracle Enterprise Linux 5.6, Vmware Server 2.0
Softwares used:
1) Vmware Server 2.02 (32-bit)
2) oracle Enterprise Linux 5.6 (32-bit)
3) Oracle 11gR2 Grid infrastuture and database (11.2.0.1 - 32-bit)
I have prepared ISO images for softwares - OEL 5 U6, 11.2.0.1 Grid Infra and 11.2.0.1 RDBMS oracle database and used these images throughout this complete setup.
Attention!!!!
I have configured this setup on a laptop with 16 GB RAM and i7 Quad Core 64-bit processor.
Each vitual Machine is configured with 2 GB RAM and 30 GB local Disk.
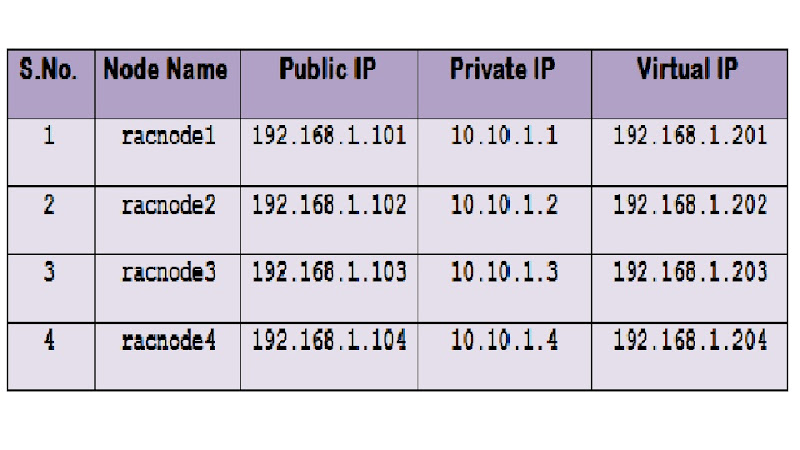
Node names and Ip address topology:
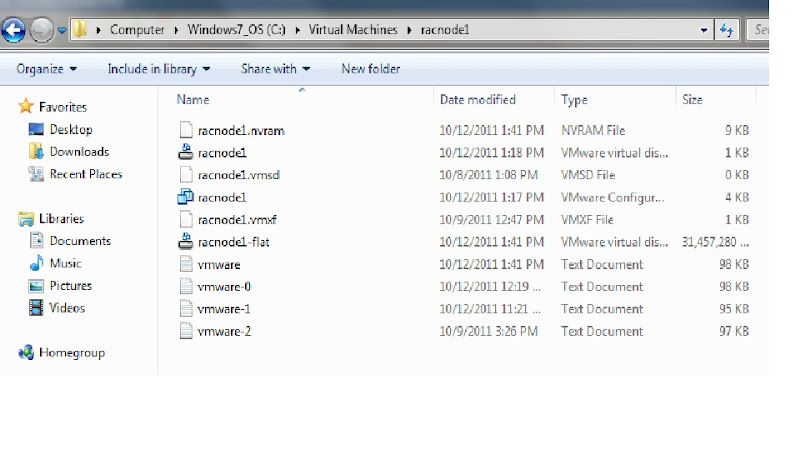
We need to have 4 Opearting systems in our Virtual machine inventory. The below is the directory structure for installing these guest operating Systems:
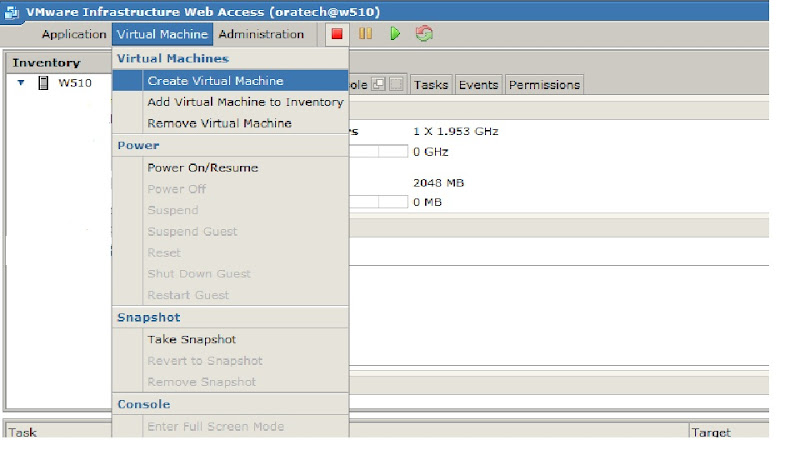
Now we will create first virtual machine racnode1
>> Login to Vmware sever web console:
>>> click on create new virtual machine.
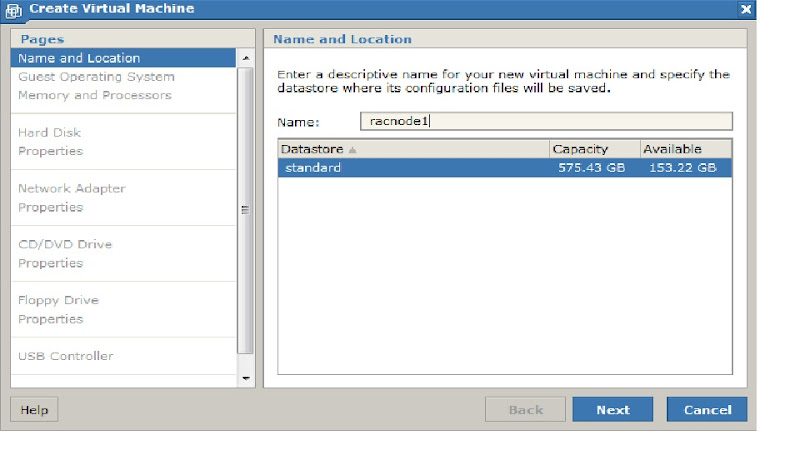
>> Specify the Host Name
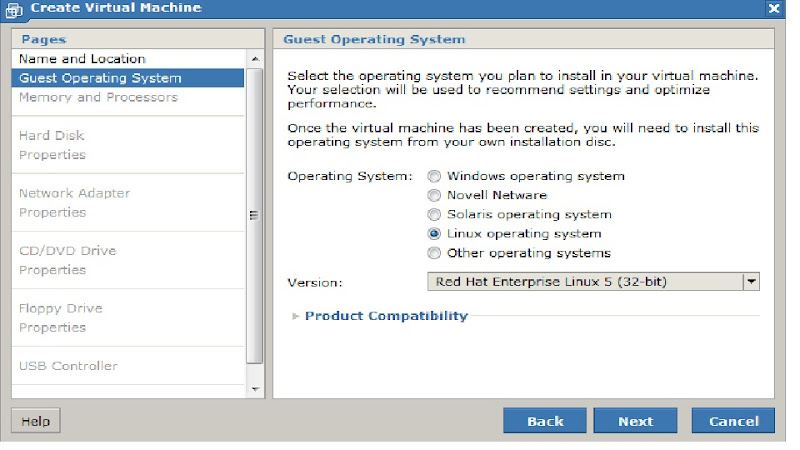
>> Select operating System type
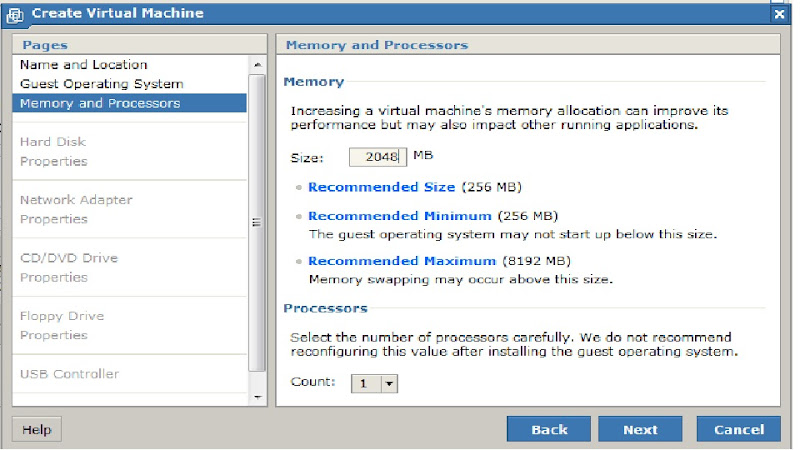
>> Select memory atleast 2 GB, if you have more resources then you can select more than 2 GB
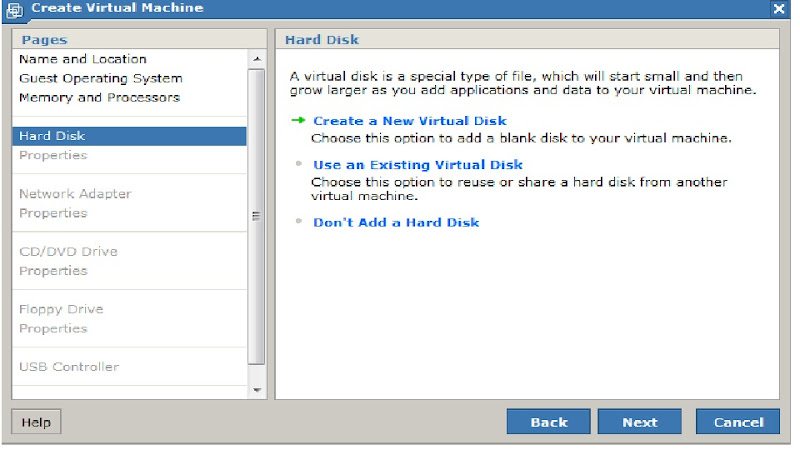
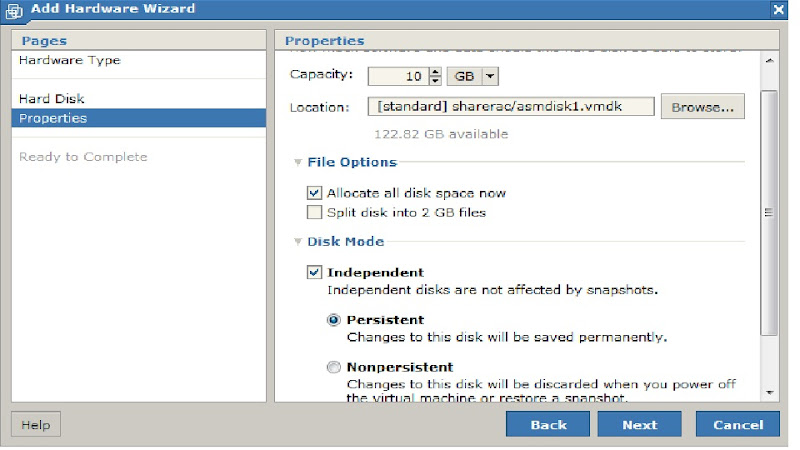
>> Create Virtual Hard Disk for racnode1 guest OS
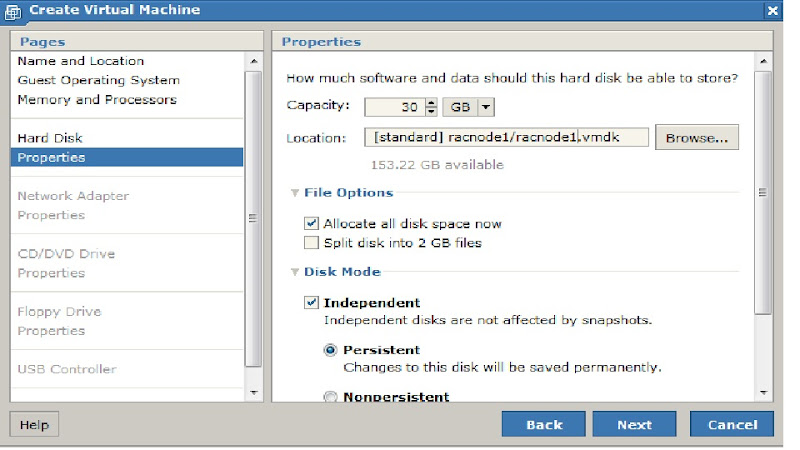
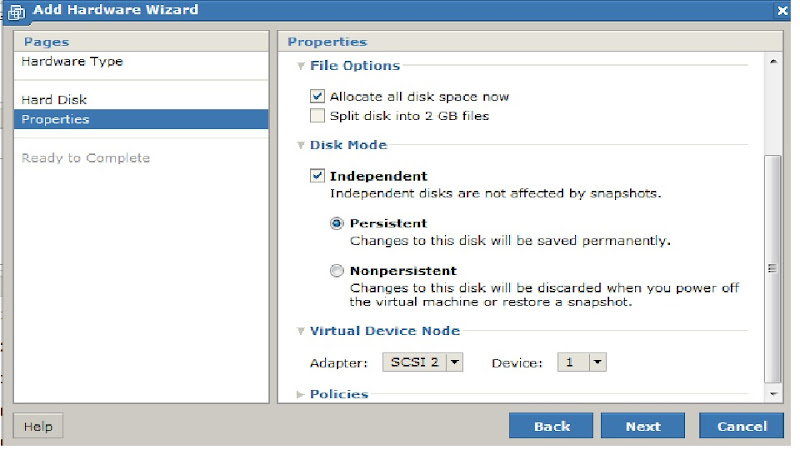
>>> File options - select Allocate disk space now
>>> Disk Mode - Independent, persistant
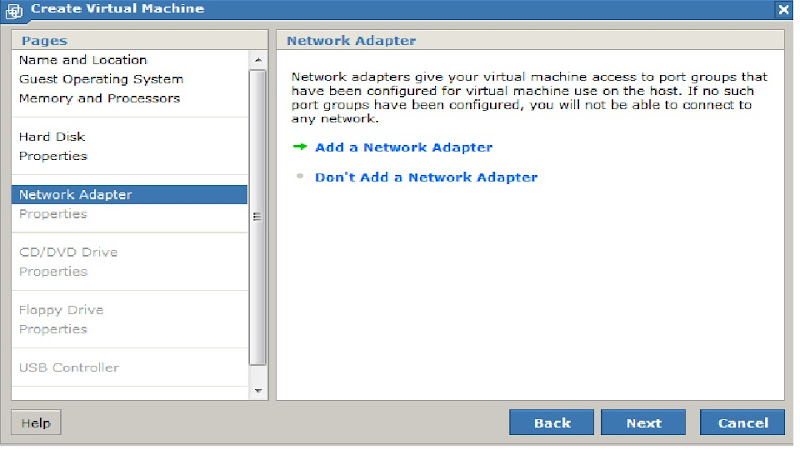
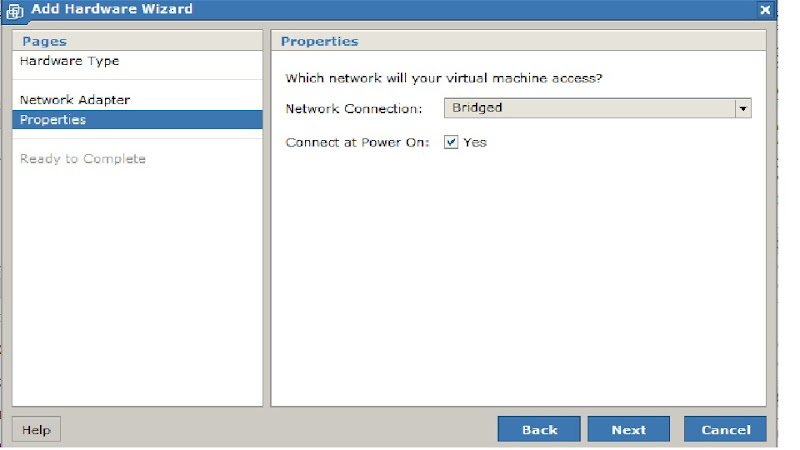
>> Select Add Network adapter
>>> Network connection - bridged
>>> Connect at power on - yes
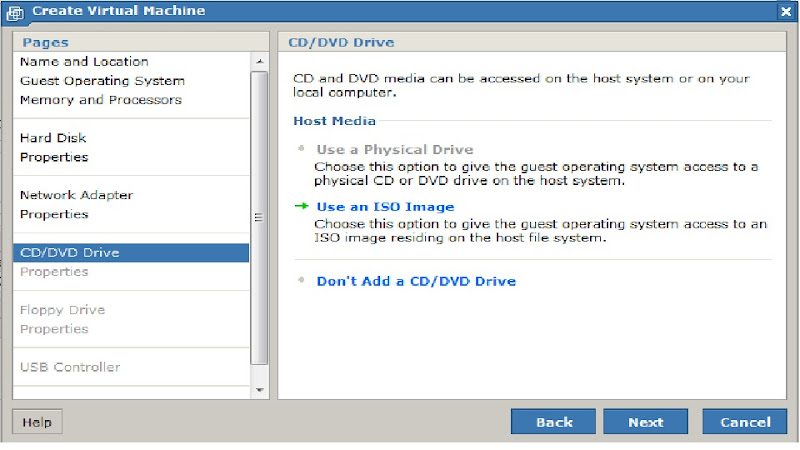
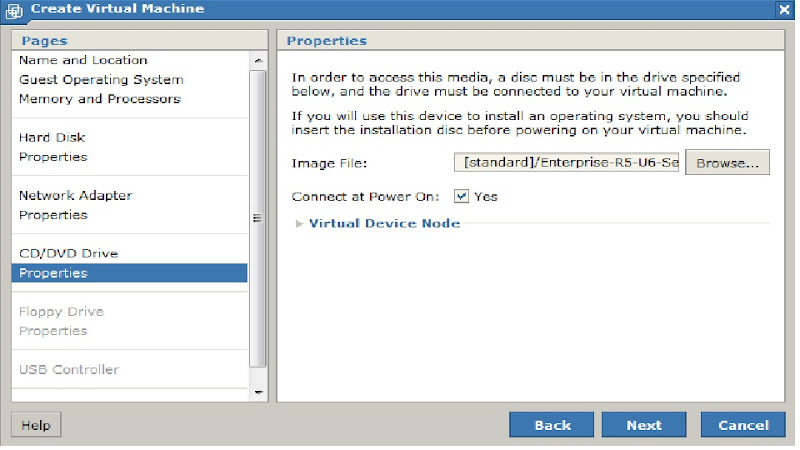
>> Select option use an Iso Image
>>> Browse and select the iso image for OEL5U6
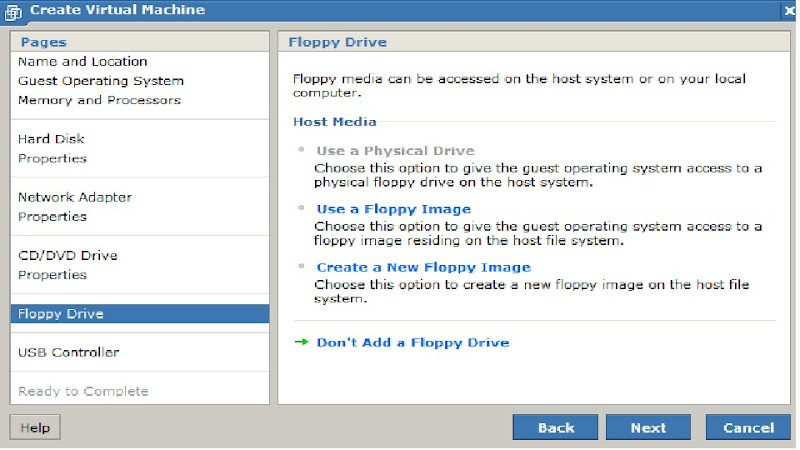
>> Select don't Add a floppy drive
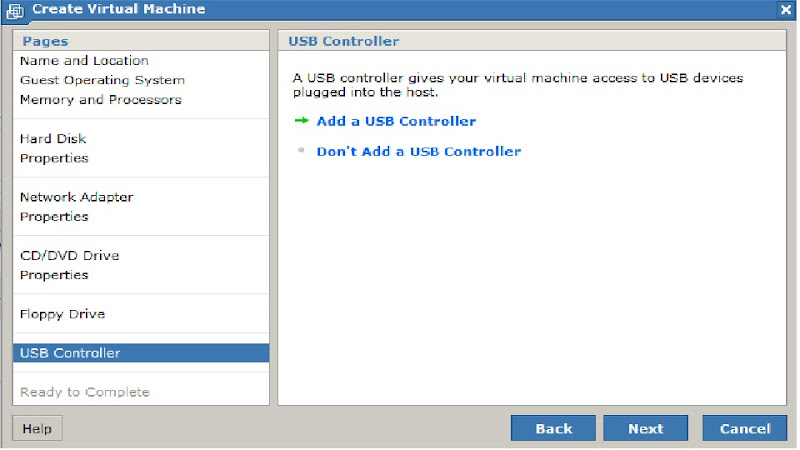
>> Select Add a USB controller
>> Make sure every thing is configured as required
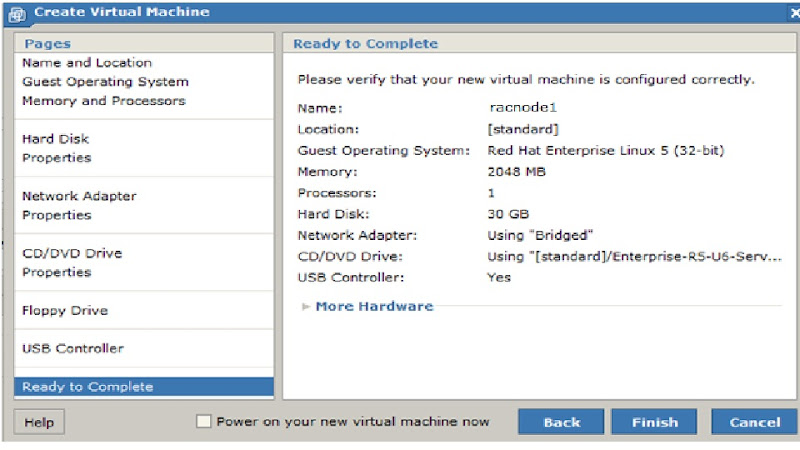
Now we have done with the creation of virtual machine. Just we need to Power ON this virtual machine and install guest Linux Operating System.
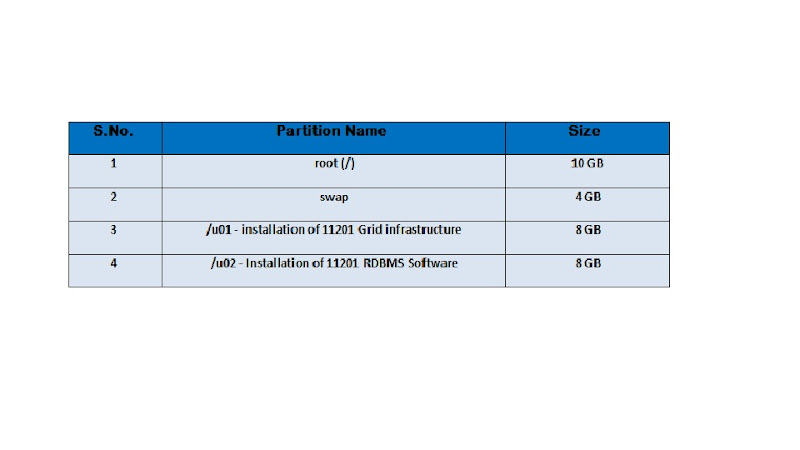
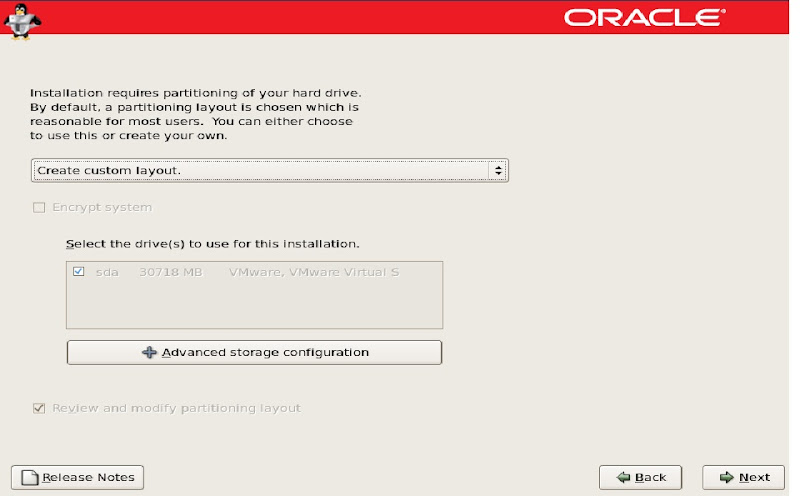
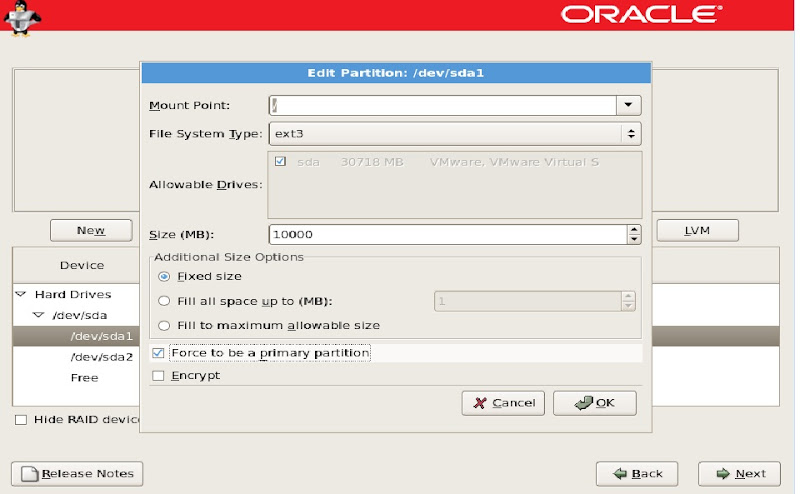
Before we begin with the Installation, just design the Disk layout for the guest Linux OS
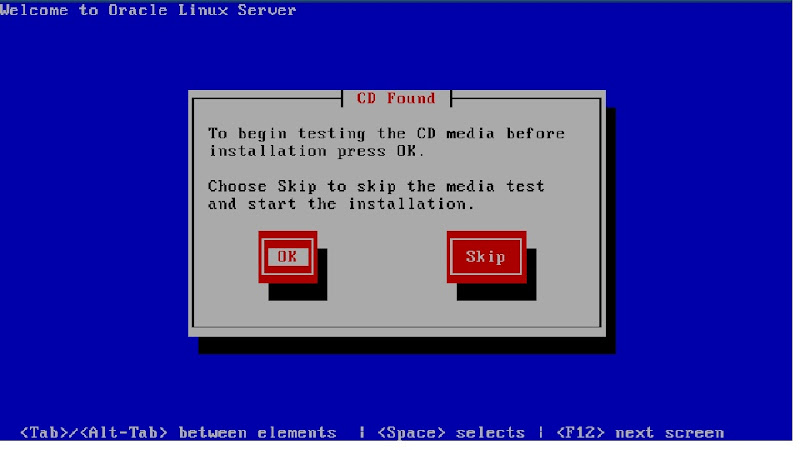
Installation of Oracle Enterprise Linux 5 and Update 6:
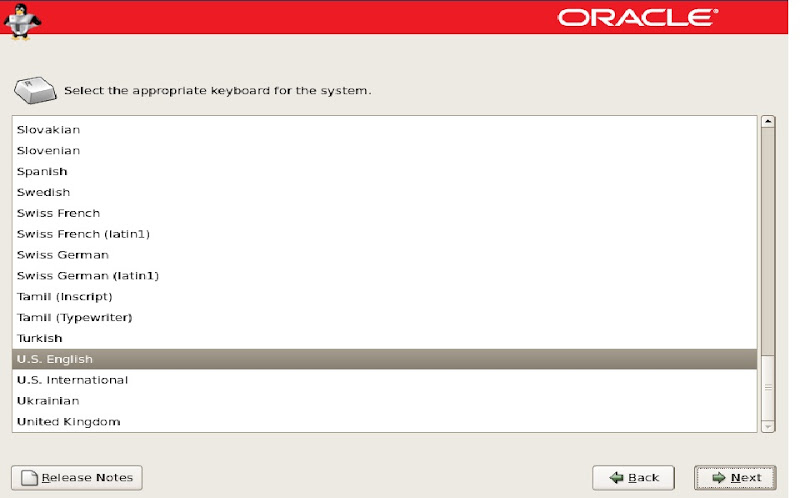
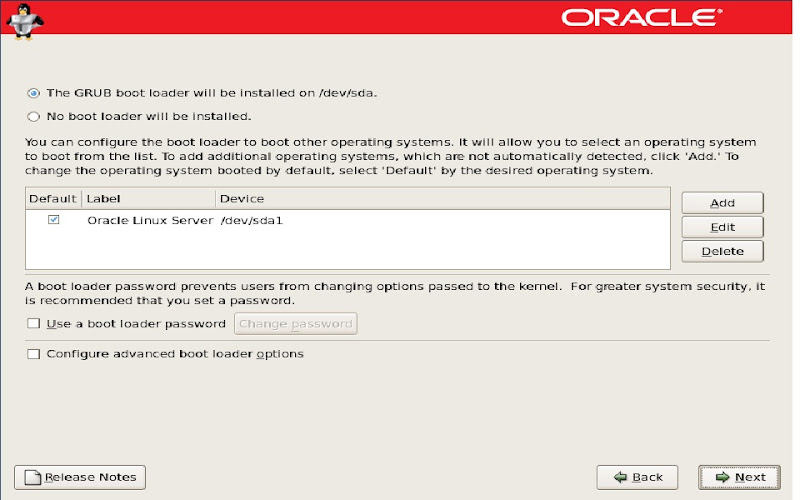
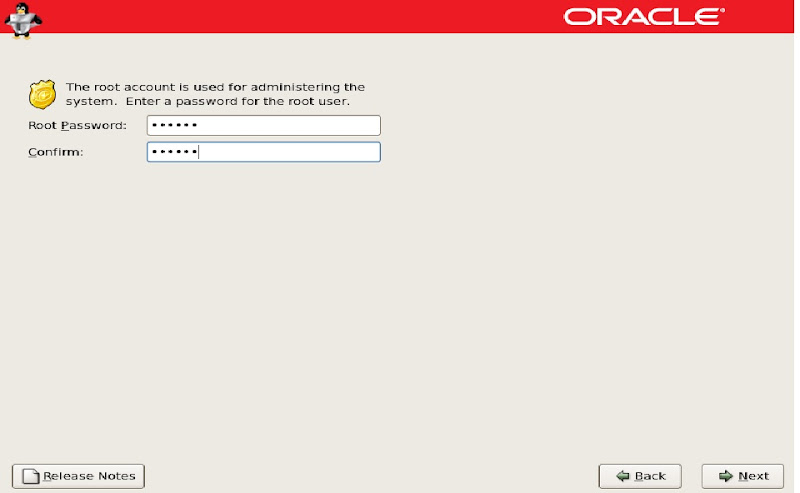
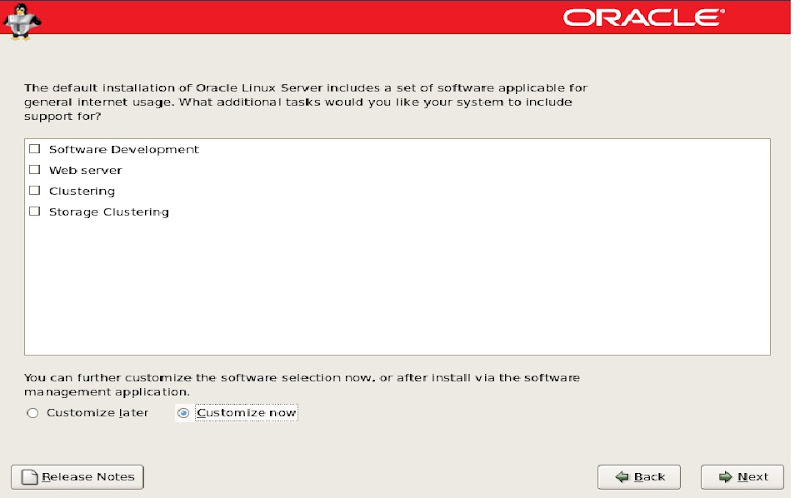
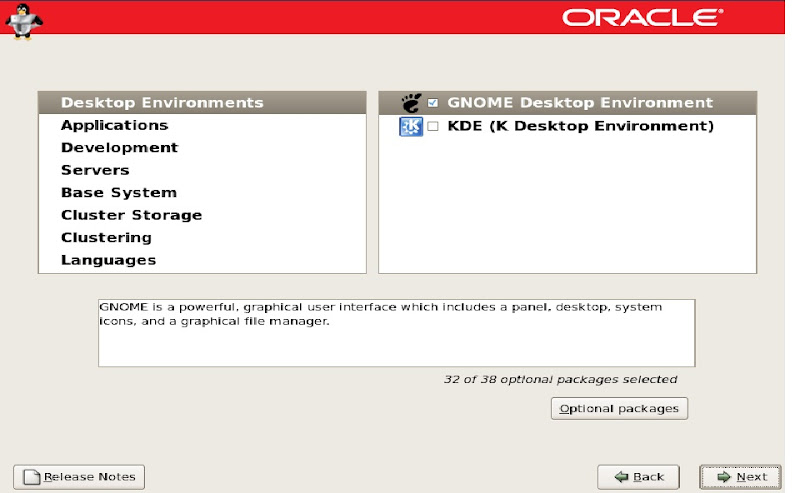
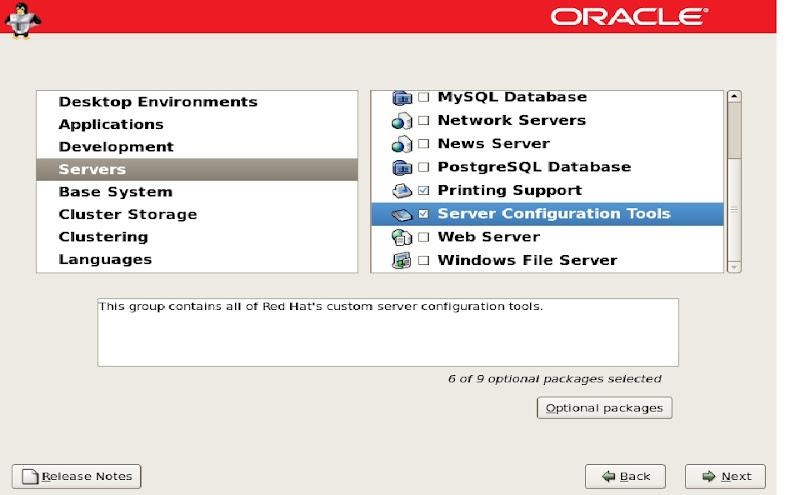
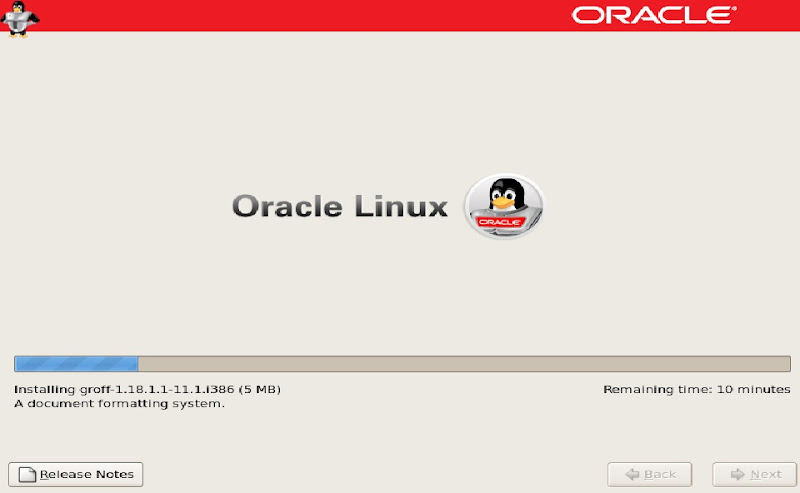
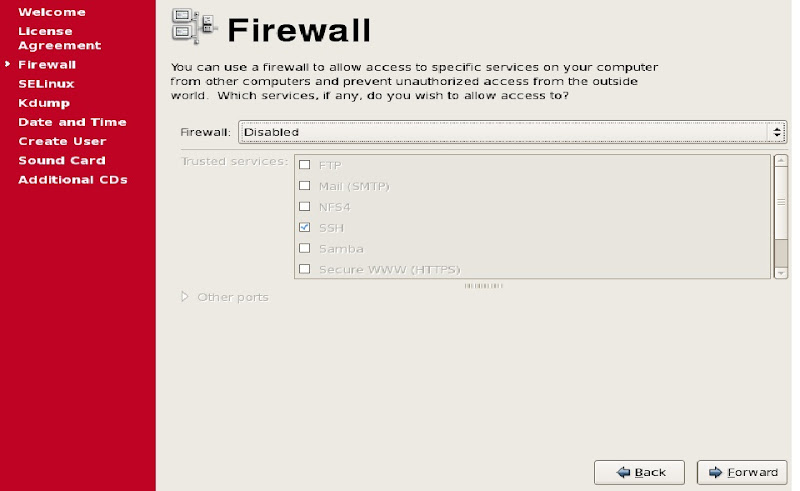
>> Installation screens for OS installation:


>>> Select data, time
>> create any normal login user
>> click finish and reboot the machine
>> After reboot login to system and shutdown the guest OS
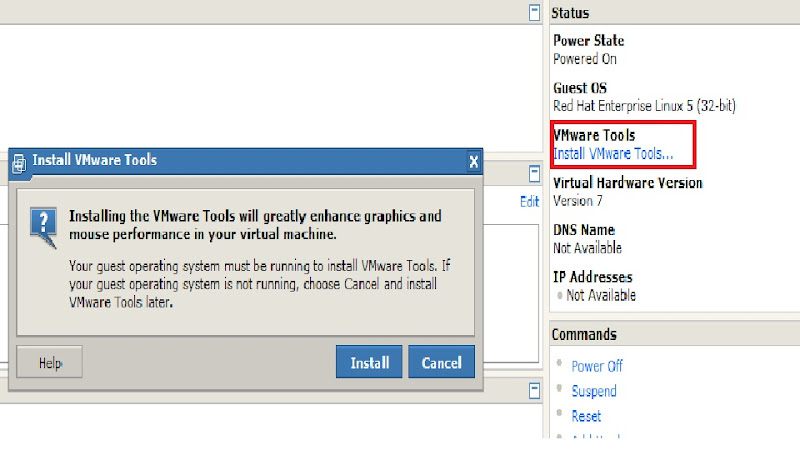
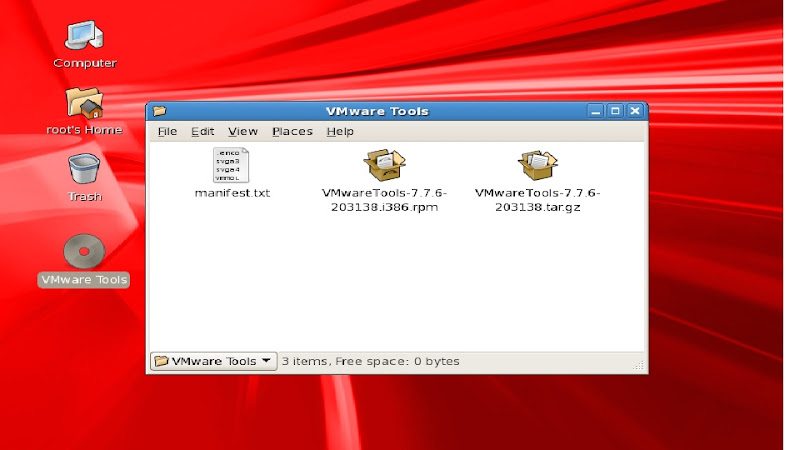
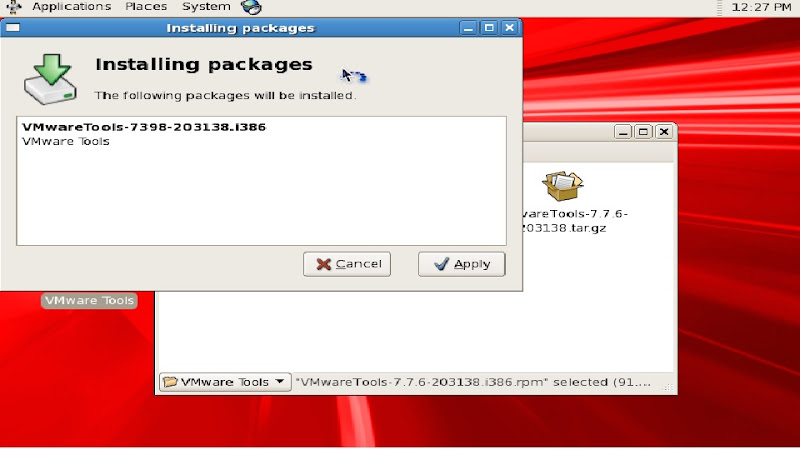
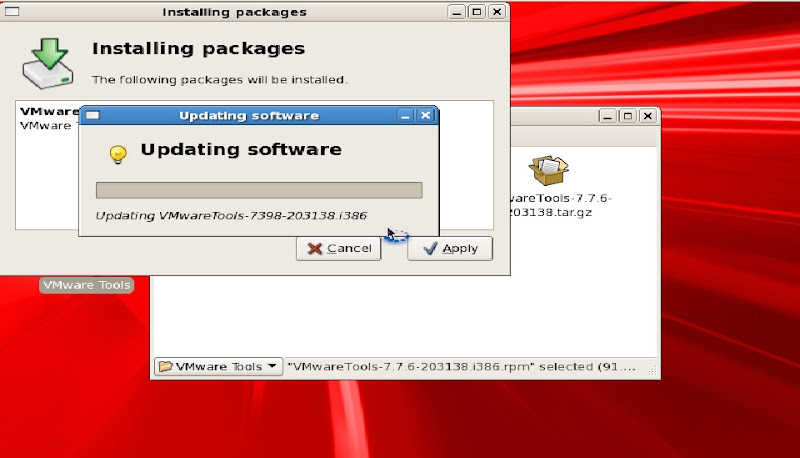
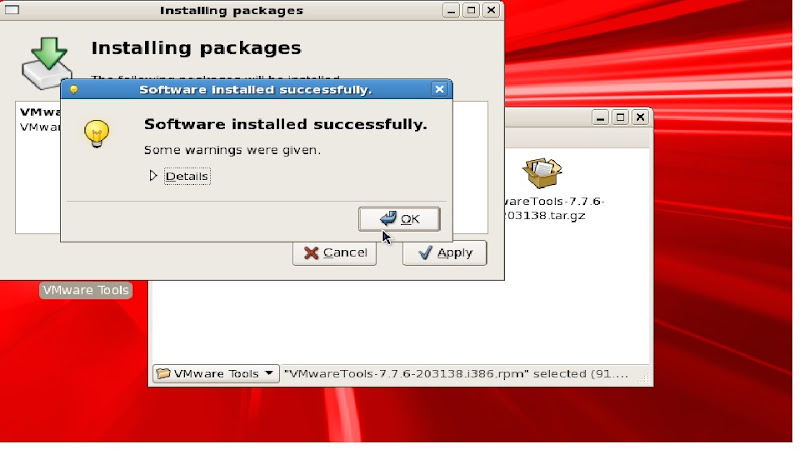
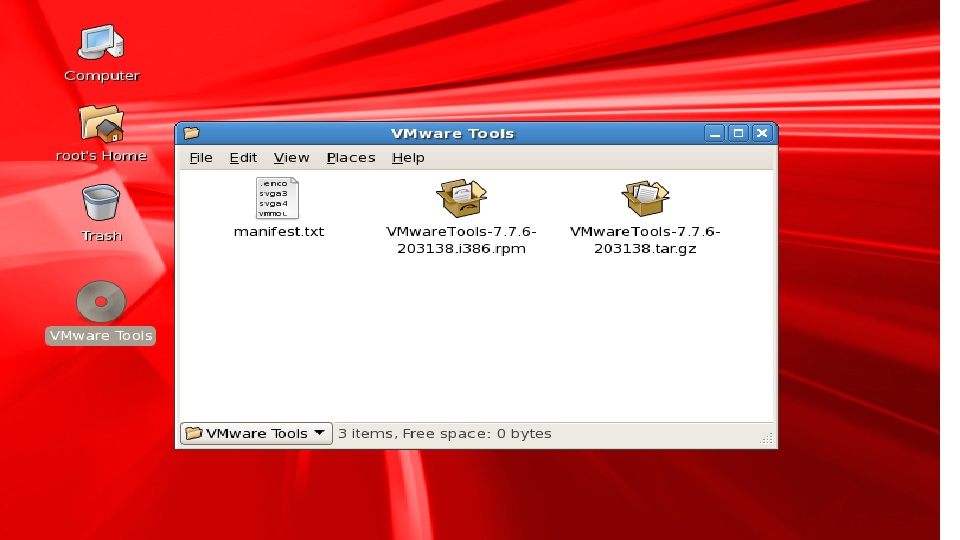
>> Install vmware tools on racnode1
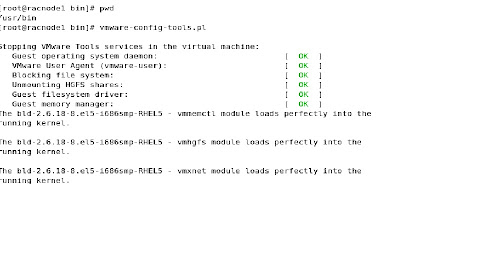
When run vmware configuration file select X display option size to 1024 X 768 - 12 option from list.
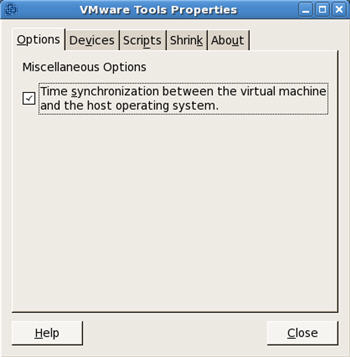
>> Run "vmware-toolbox" command and check the "Time synchronization" option and click the "Close" the window.
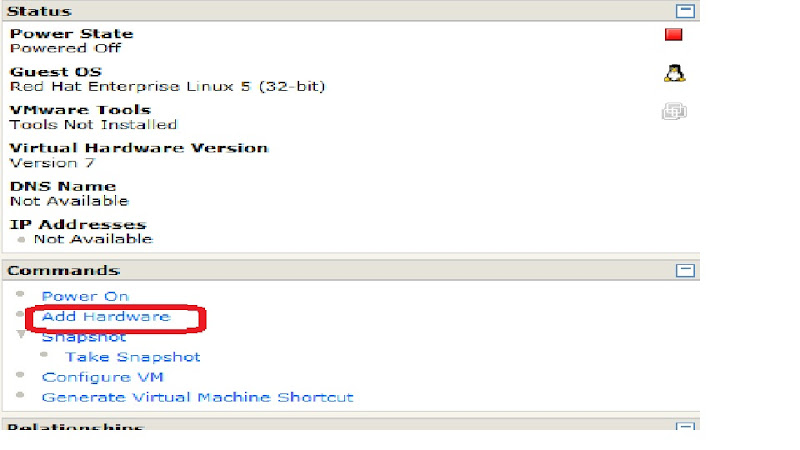
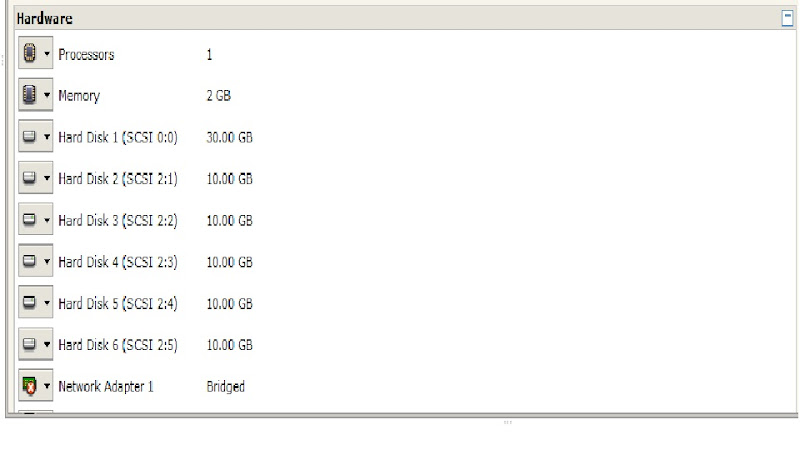
Now add additional hardware to virtual machine.
Virtual Machine >> Summary >> Add Hardware
>> Click Next >> Finish
>> This will add up the hard disk to our existing virtual machine.
>> Similarly add 4 more hard Disks
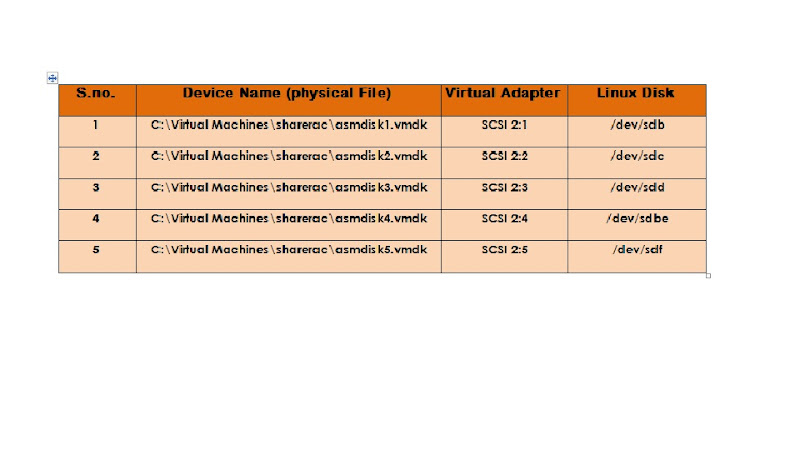
After adding additional hard disks and Nw adapter the Vm summary:
Now Edit the virtual machine racnode1.vmx file to configure disk sharing across nodes:
>> Now power ON racnode1, it should detect additionally configured HW and format new Hard Disks.
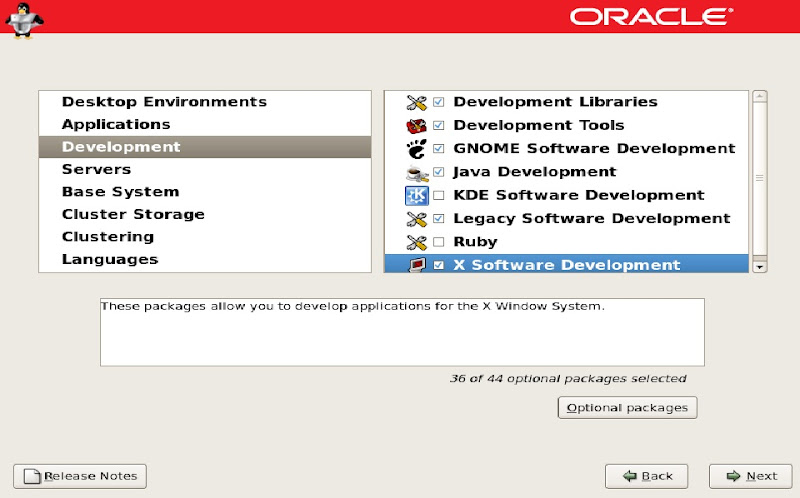
>> Install additional oracle rpms
>> Configure ASM libraries on racnode1
>> Create ASM Disks
>> configure /etc/hosts file racnode1
>> configure kernel parameters (Edit /etc/sysctl.conf)
>> Edit /etc/security/limits.conf
>> Disable service for NTP (Network time protocol)
>> Add OS group and user
>> create Installation directories and change permissions
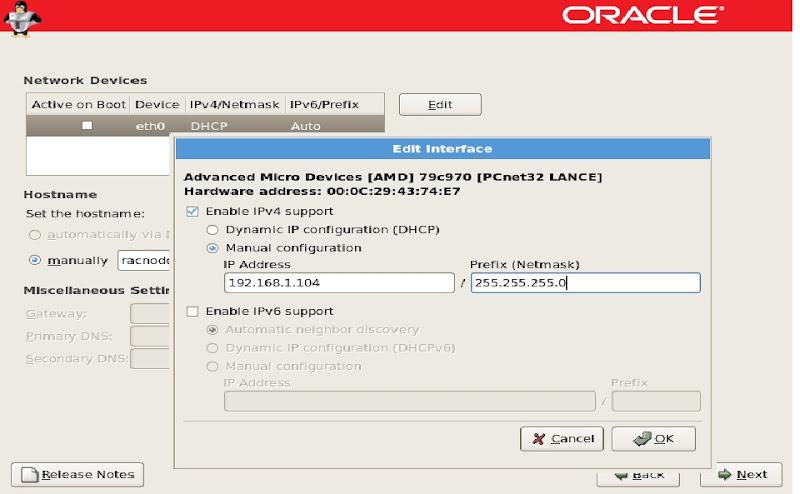
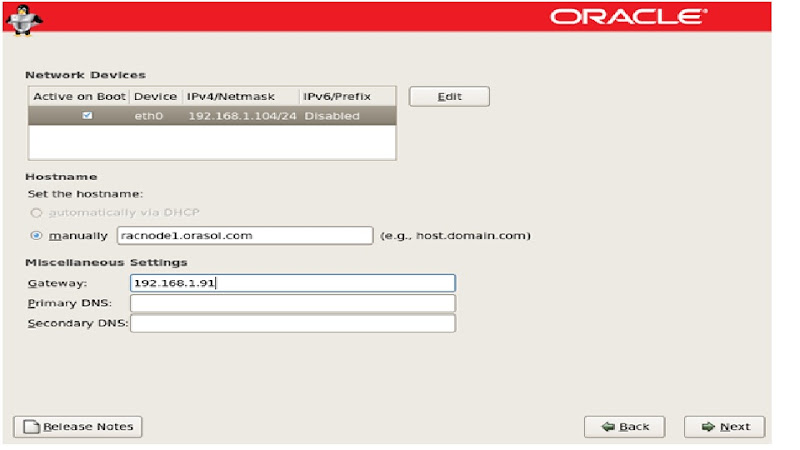
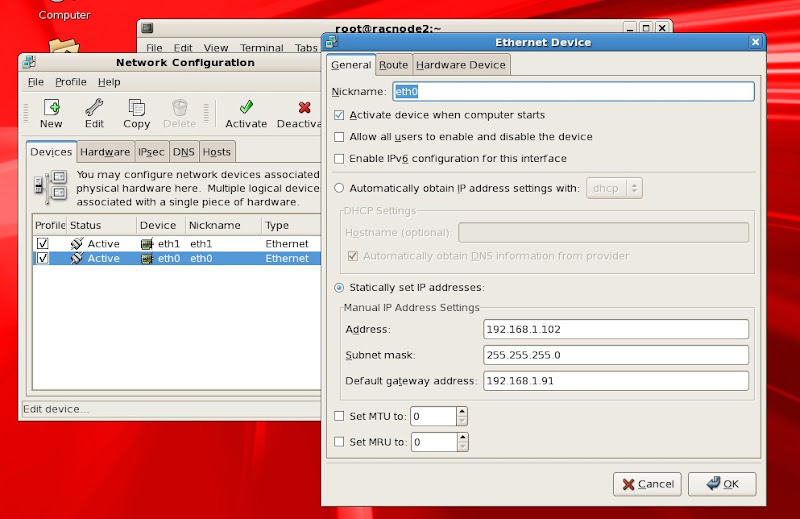
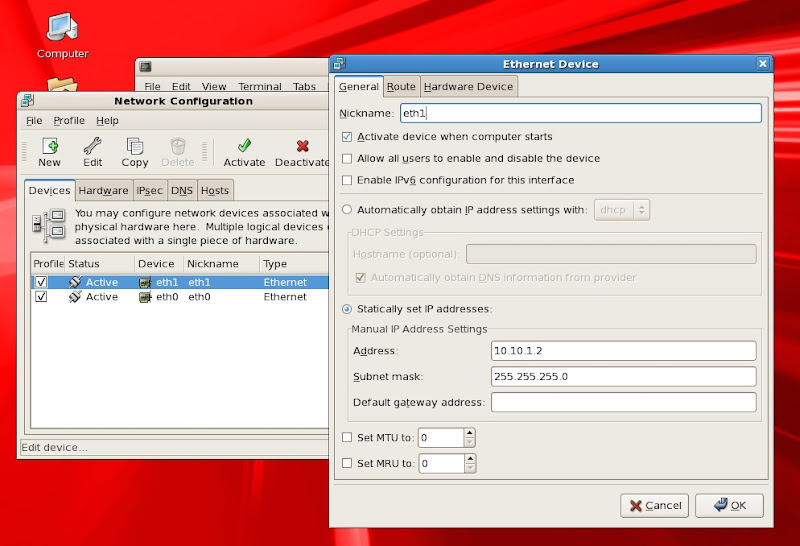
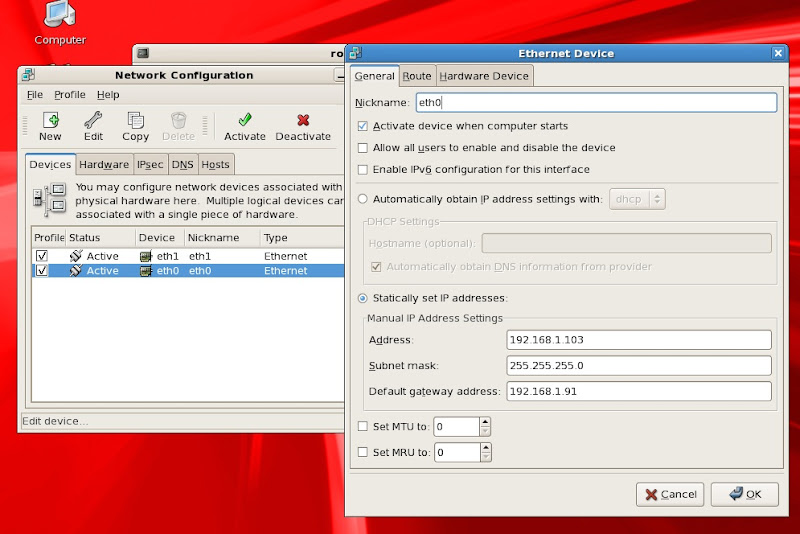
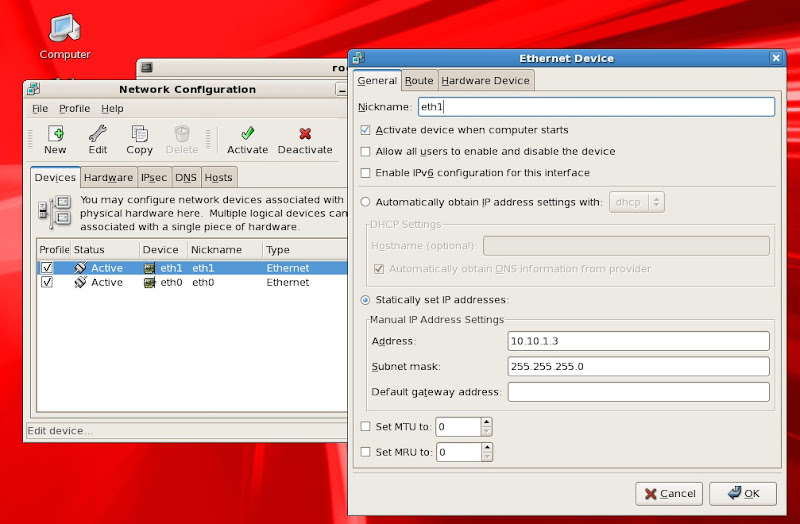
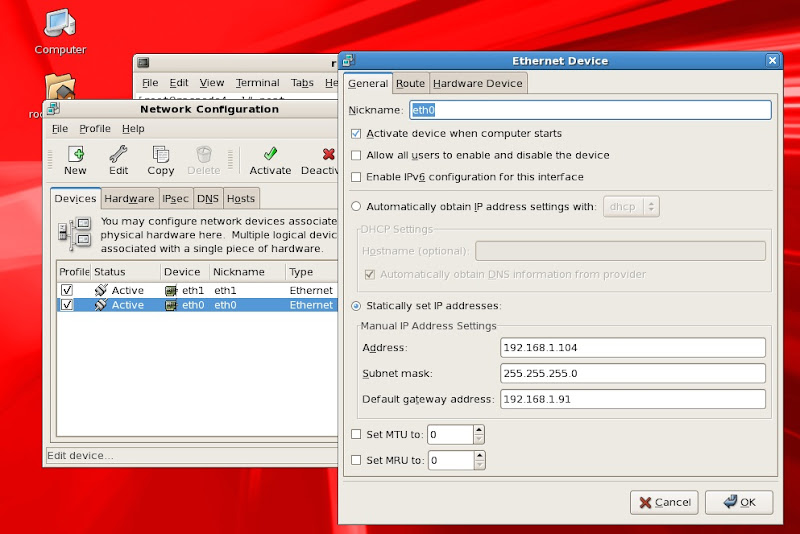
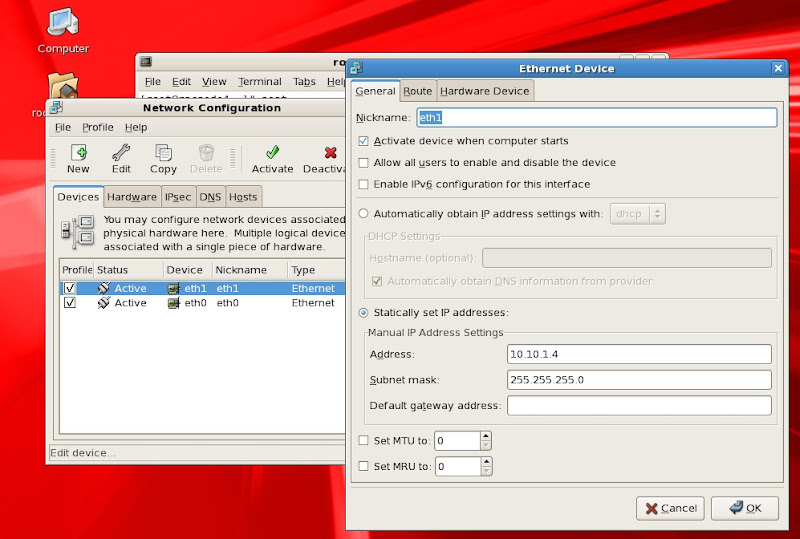
>> Verify Ethernet cards settings and hostname
>>> run "neat" command as root user
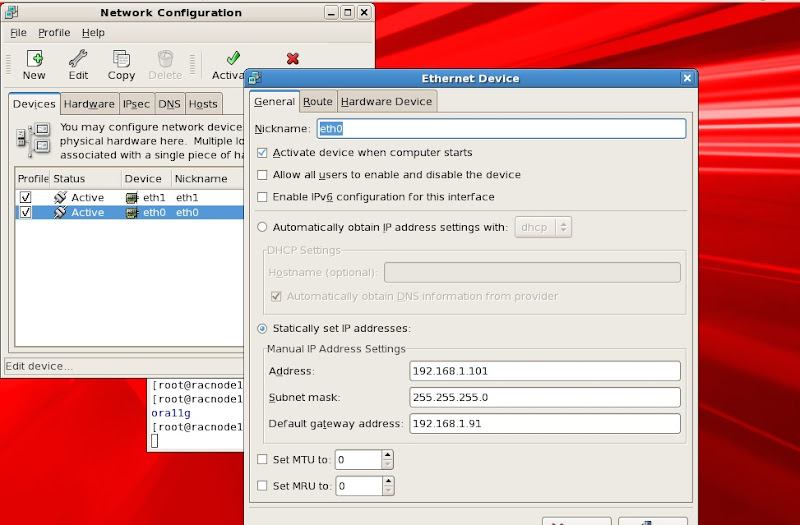
>>> configure eth1 with IP address 10.10.1.1 for private interconnect and deselect assign IP address with DHCP
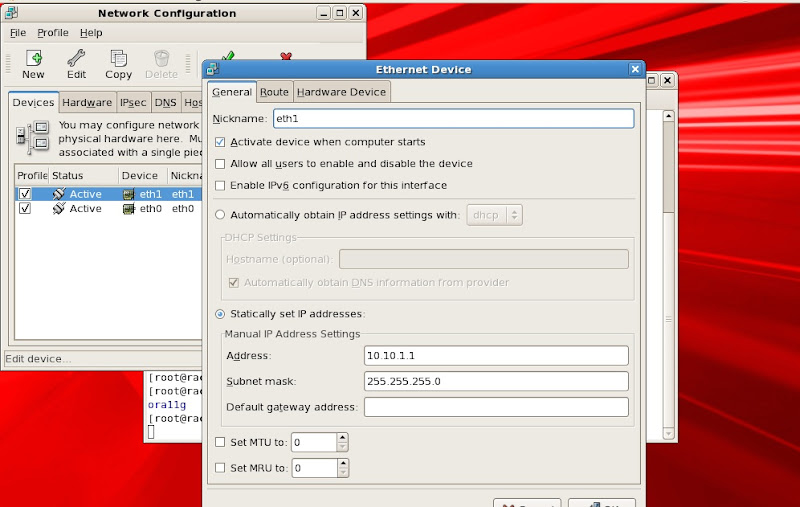
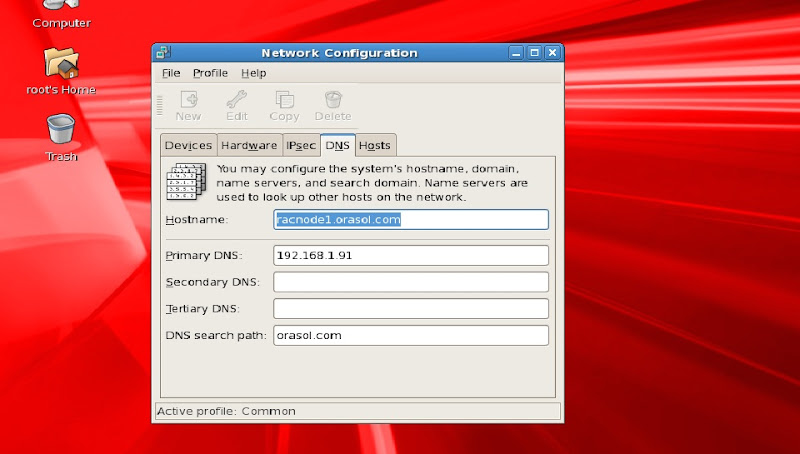
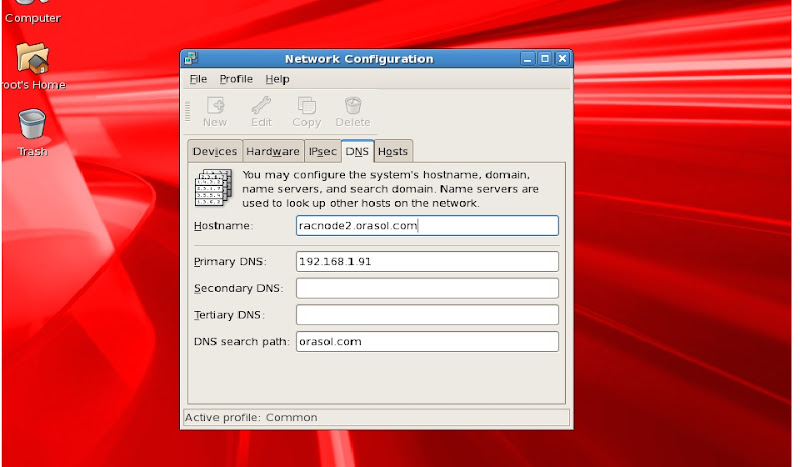
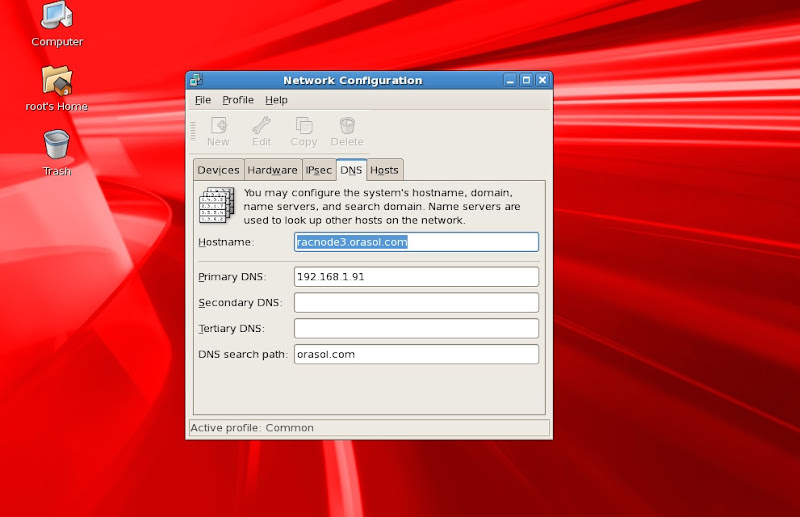
>>> Verify dns settings and hostname
>> Now shutdown the virtual machine and copy all these Vrtual machine (racnode1) files to another virtual machine directories racnode2, racnode3 and racnode4 respectively.
>> After copying these files perfrom the below changes
Note: You can open this file using notepad
1)Rename racnode1.vmx to racnode2.vmx under racnode2 folder. Similarly rename files racnode3.vmx and racnode4.vmx from racnode1.vmx from their respective folders.
2) change the display name in racnode2.vmx, racnode3.vmx, racnode4.vmx in their respective vmware nodes configuration file.
>> configure the hosts file and network settings on each node
Note: Disable IPV6, DHCP for eth0, eth1 on all nodes and deactivate and delete ethernet cards with name eth0.bak, eth1.bak
racnode2
/etc/hosts file:
racnode3
/etc/hosts file:
racnode4

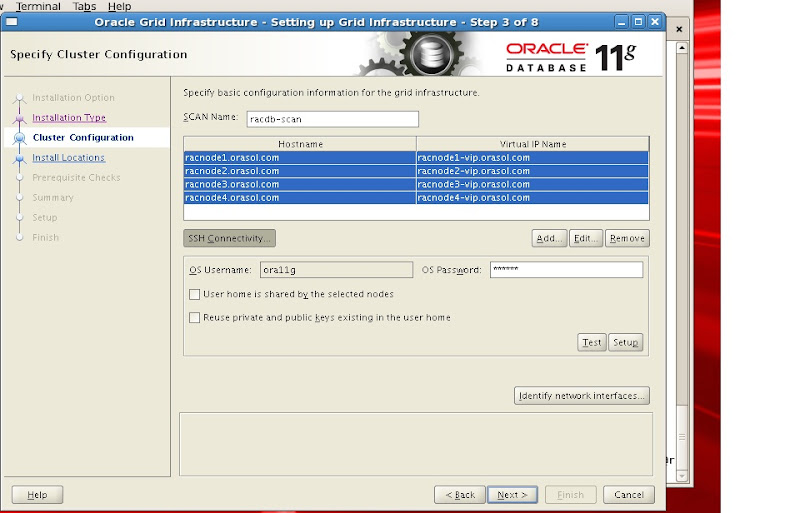
>> As this is testing RAC I am using SCAN IP in /etc/hosts file.
>> Save the network configuration and restart all nodes.
>> Now check NW connectivity between the all nodes
>> Check similarly on all other nodes (racnode2, racnode3, racnode4)
>> Mount the ISO image for 11.2.0.1 Grid Infrastructure and proceed with Installation.
>> Run xhost + as root user
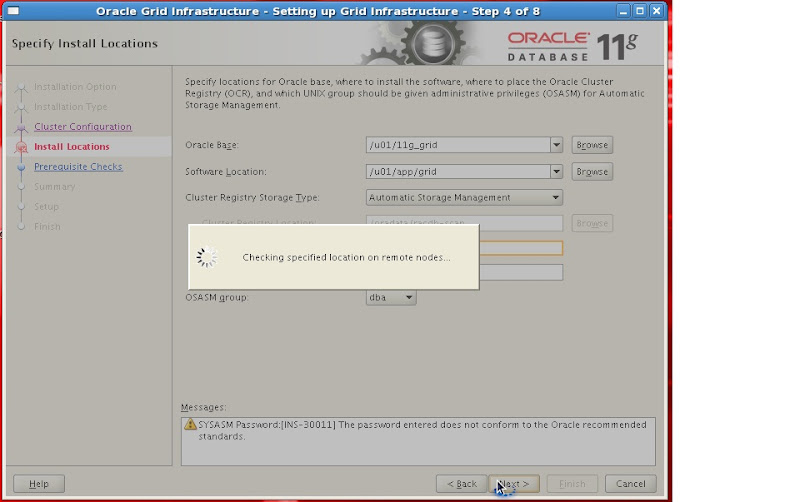
>> login to ora11g account and excute run Installer
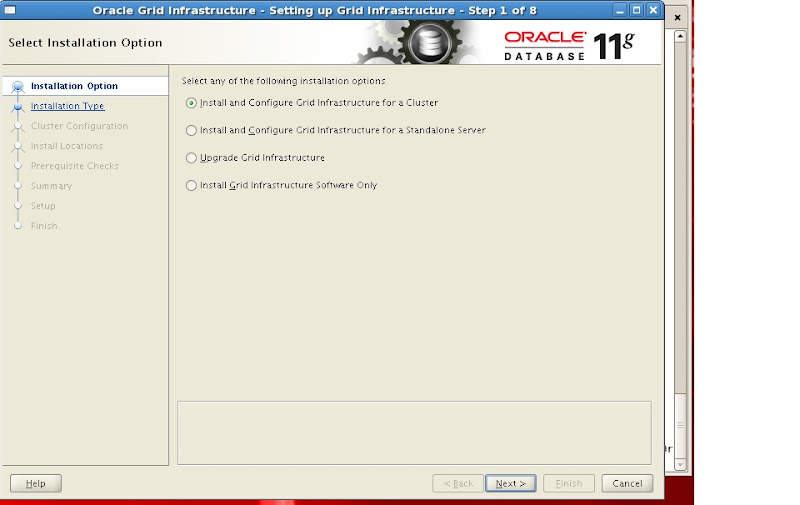
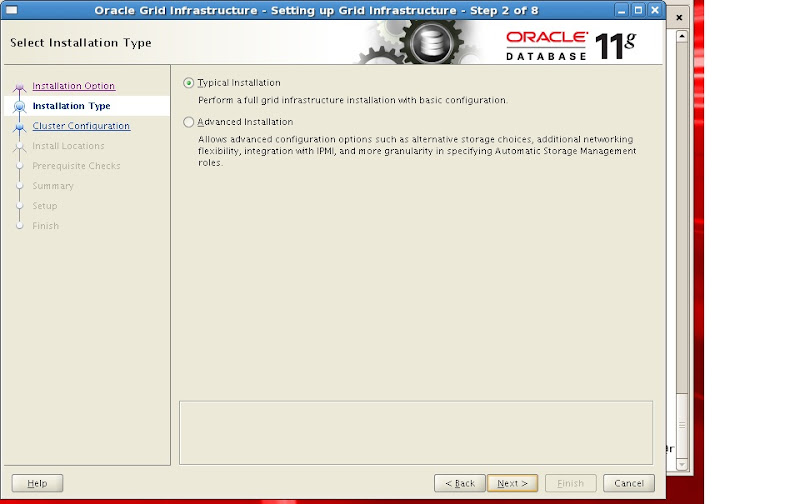
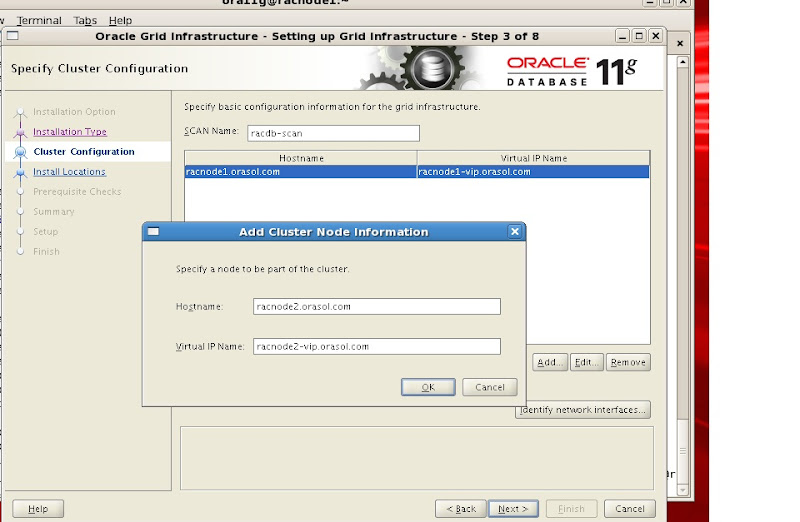
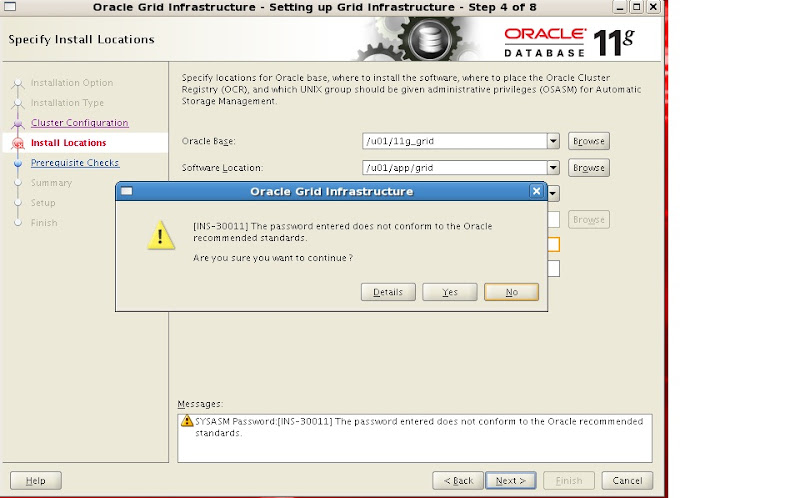
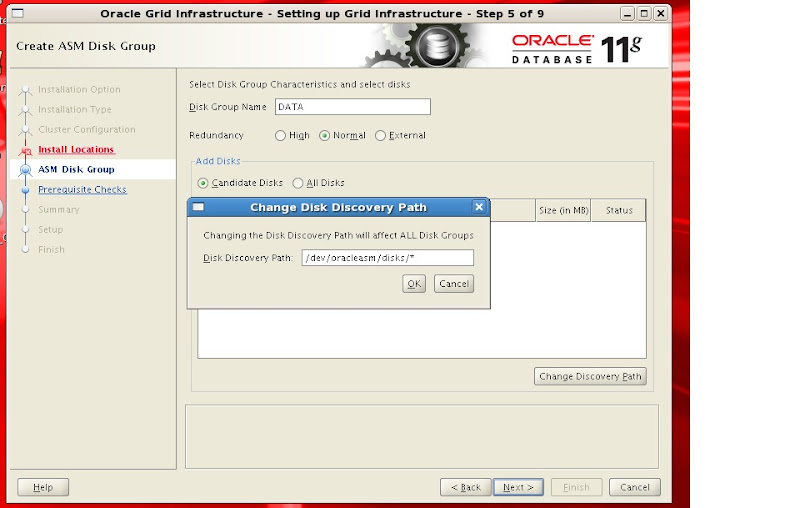
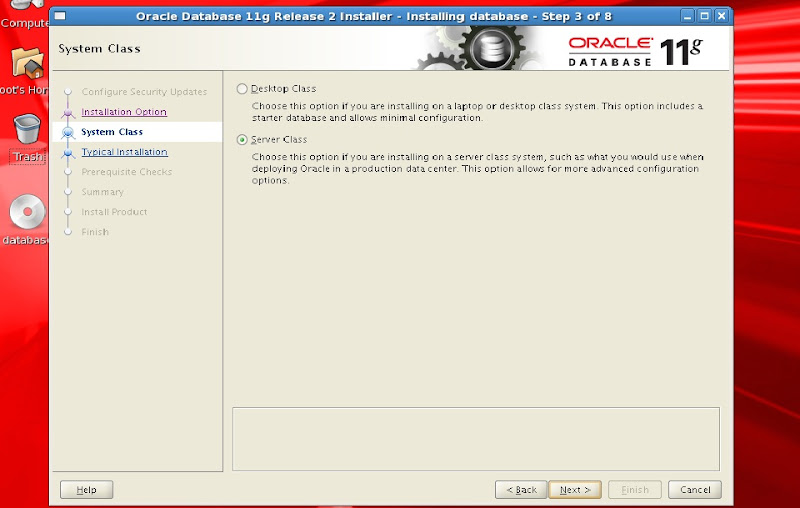
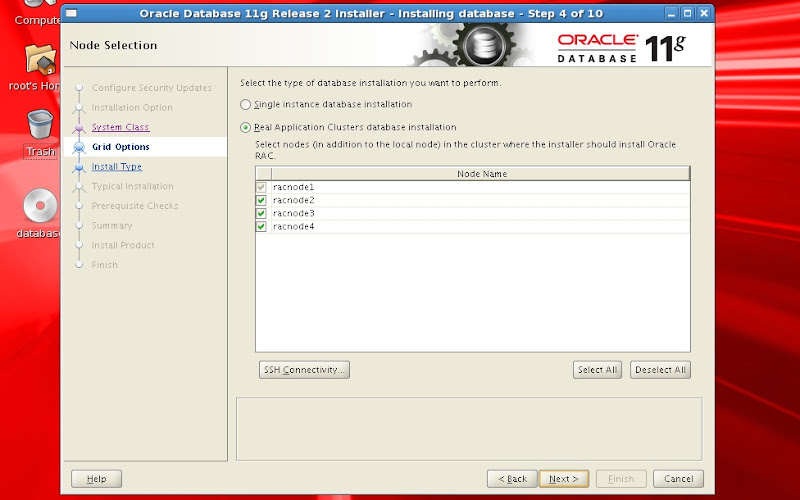
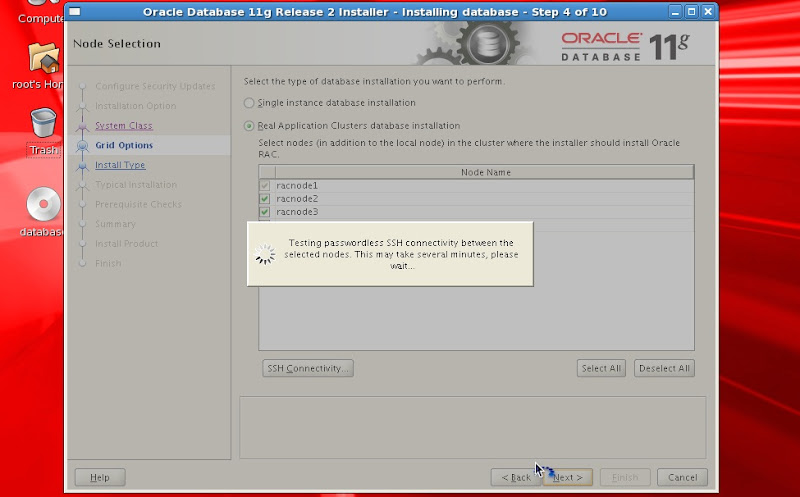
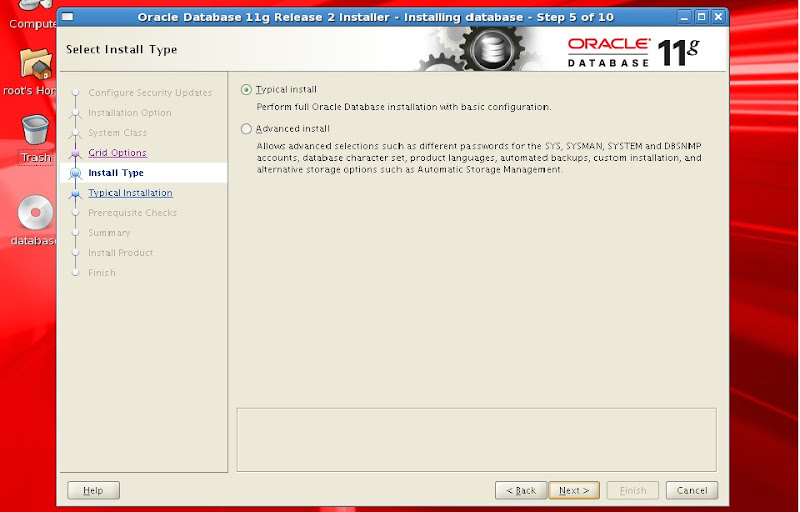
>> Screen shots for Grid infrastructure Installation

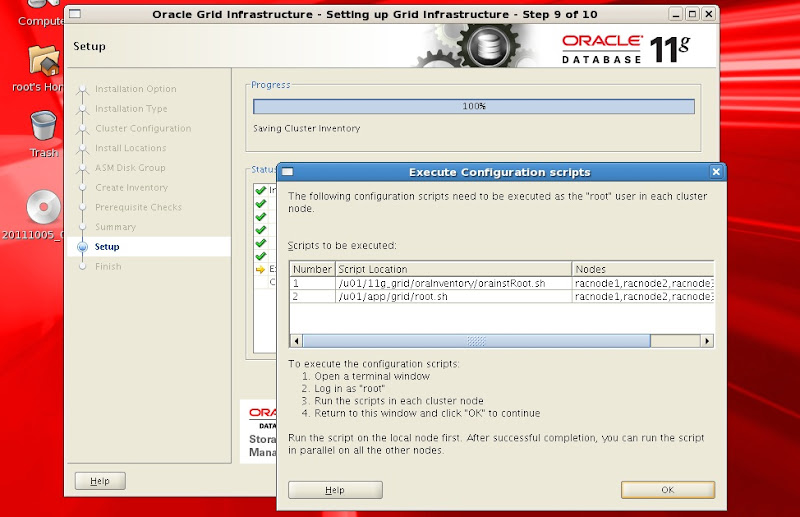
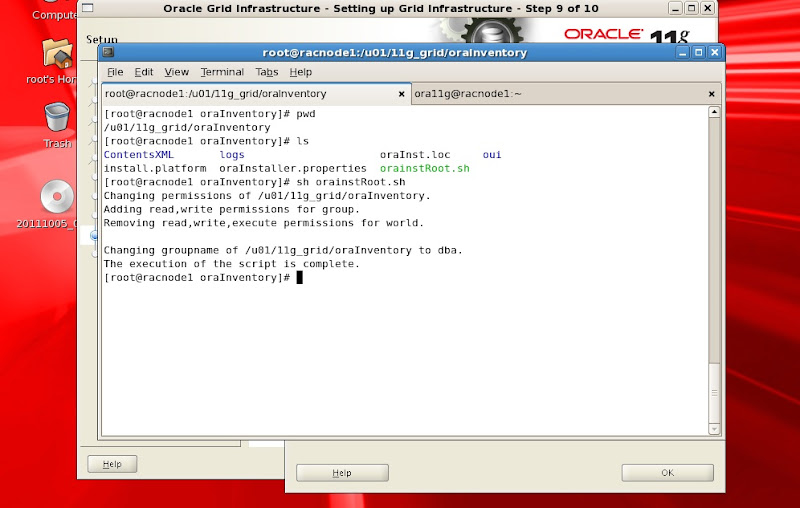
>> Run the script orainstRoot.sh on racnode1 first after running on it execute on racnode2, racnode3 and racnode4 individually.
>> Similarly run root.sh first on racnode1
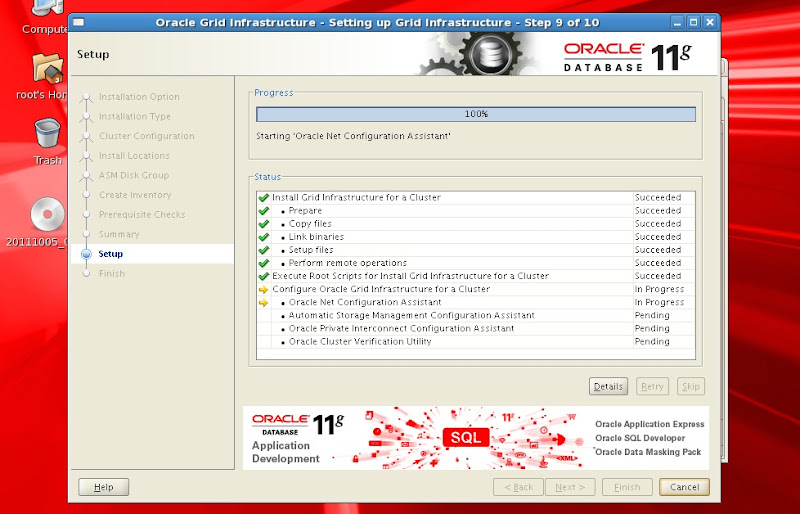
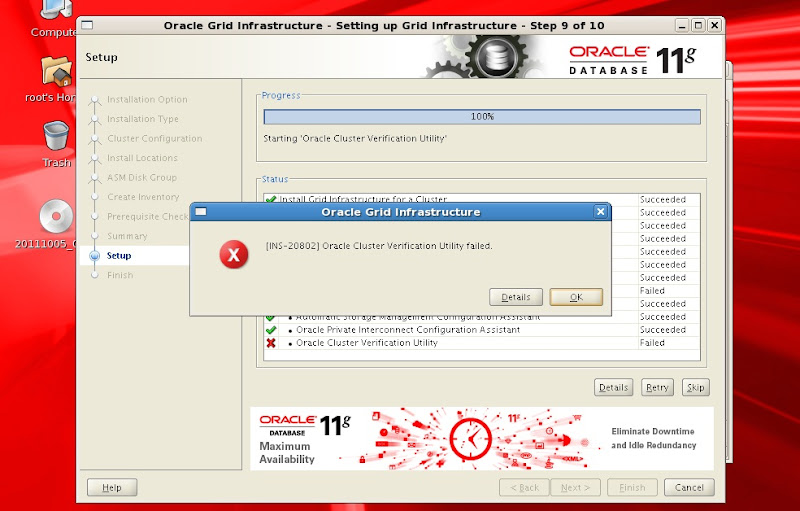
>> after successfull excution of orainstRoot.sh and root.sh on all nodes click ok
>> check the status of clusterware
>> Eject the media for Grid Infra and mount ISO image for 11201 rdbms sw.
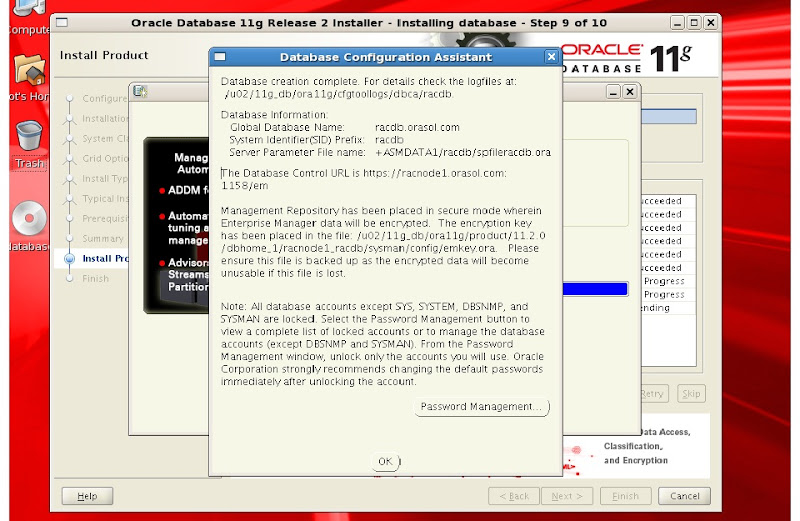
>> Screens for Oracle Sw and creation of RAC database


>> Add entries in the .bash_profile on all rac nodes
>> check the status of RACDB from any of the node
Thanks for visiting my blog !!!
Any comments and suggestions are highly appreciated.
Syed Zaheer
The article below is my personal experience for Installing, configuring and creating a 4 Node 11gR2 (11.2.0.1) RAC database on Oracle Enterprise Linux 5.6, Vmware Server 2.0
Softwares used:
1) Vmware Server 2.02 (32-bit)
2) oracle Enterprise Linux 5.6 (32-bit)
3) Oracle 11gR2 Grid infrastuture and database (11.2.0.1 - 32-bit)
I have prepared ISO images for softwares - OEL 5 U6, 11.2.0.1 Grid Infra and 11.2.0.1 RDBMS oracle database and used these images throughout this complete setup.
Attention!!!!
I have configured this setup on a laptop with 16 GB RAM and i7 Quad Core 64-bit processor.
Each vitual Machine is configured with 2 GB RAM and 30 GB local Disk.
Node names and Ip address topology:

We need to have 4 Opearting systems in our Virtual machine inventory. The below is the directory structure for installing these guest operating Systems:
C:\Virtual Machines\racnode1
C:\Virtual Machines\racnode2
C:\Virtual Machines\racnode3
C:\Virtual Machines\racnode4
C:\Virtual Machines\sharerac (Shared storage for OCR, VD and RAC database)
Now we will create first virtual machine racnode1
>> Login to Vmware sever web console:
>>> click on create new virtual machine.

>> Specify the Host Name

>> Select operating System type

>> Select memory atleast 2 GB, if you have more resources then you can select more than 2 GB

>> Create Virtual Hard Disk for racnode1 guest OS
>>> File options - select Allocate disk space now
>>> Disk Mode - Independent, persistant


>> Select Add Network adapter
>>> Network connection - bridged
>>> Connect at power on - yes

>> Select option use an Iso Image
>>> Browse and select the iso image for OEL5U6


>> Select don't Add a floppy drive

>> Select Add a USB controller

>> Make sure every thing is configured as required

Now we have done with the creation of virtual machine. Just we need to Power ON this virtual machine and install guest Linux Operating System.
Before we begin with the Installation, just design the Disk layout for the guest Linux OS

Installation of Oracle Enterprise Linux 5 and Update 6:
>> Installation screens for OS installation:


>>> Select data, time
>> create any normal login user
>> click finish and reboot the machine
>> After reboot login to system and shutdown the guest OS
>> Install vmware tools on racnode1


When run vmware configuration file select X display option size to 1024 X 768 - 12 option from list.
>> Run "vmware-toolbox" command and check the "Time synchronization" option and click the "Close" the window.

Now add additional hardware to virtual machine.
Virtual Machine >> Summary >> Add Hardware


>> Click Next >> Finish
>> This will add up the hard disk to our existing virtual machine.
>> Similarly add 4 more hard Disks

After adding additional hard disks and Nw adapter the Vm summary:

Now Edit the virtual machine racnode1.vmx file to configure disk sharing across nodes:
disk.locking = "FALSE"
disKLib.datacacheMaxsize= "0"
disKLib.datacacheMaxReadAheadsize= "0"
disKLib.datacacheMinReadAheadsize= "0"
disKLib.datacachepagesize= "4096"
disKLib.maxUnsynceWrites = "0"

scsi2.present = "TRUE"
scsi2.sharedBus = "none"
scsi2.virtualDev = "lsilogic"

scsi2:1.present = "TRUE"
scsi2:1.fileName = "C:\Virtual Machines\sharerac\asmdisk1.vmdk"
scsi2:1.writeThrough = "TRUE"
scsi2:1.mode = "independent-persistent"
scsi2:1.deviceType = "disk"
scsi2:1.redo = ""

scsi2:2.present = "TRUE"
scsi2:2.fileName = "C:\Virtual Machines\sharerac\asmdisk2.vmdk"
scsi2:2.writeThrough = "TRUE"
scsi2:2.mode = "independent-persistent"
scsi2:2.deviceType = "disk"
scsi2:2.redo = ""


scsi2:3.present = "TRUE"
scsi2:3.fileName = "C:\Virtual Machines\sharerac\asmdisk3.vmdk"
scsi2:3.writeThrough = "TRUE"
scsi2:3.mode = "independent-persistent"
scsi2:3.deviceType = "disk"
scsi2:3.redo = ""

scsi2:4.present = "TRUE"
scsi2:4.fileName = "C:\Virtual Machines\sharerac\asmdisk4.vmdk"
scsi2:4.writeThrough = "TRUE"
scsi2:4.mode = "independent-persistent"
scsi2:4.deviceType = "disk"
scsi2:4.redo = ""

scsi2:5.present = "TRUE"
scsi2:5.fileName = "C:\Virtual Machines\sharerac\asmdisk5.vmdk"
scsi2:5.writeThrough = "TRUE"
scsi2:5.mode = "independent-persistent"
scsi2:5.deviceType = "disk"
scsi2:5.redo = ""
>> Now power ON racnode1, it should detect additionally configured HW and format new Hard Disks.
[root@racnode1 dev]# ls sd*
sda  sda1  sda2  sda3  sda4  sda5  sdb  sdc  sdd  sde  sdf
[root@racnode1 dev]# fdisk sdb
Device contains neither a valid DOS partition table, nor Sun, SGI or OSF disklabel
Building a new DOS disklabel. Changes will remain in memory only,
until you decide to write them. After that, of course, the previous
content won't be recoverable.


The number of cylinders for this disk is set to 1305.
There is nothing wrong with that, but this is larger than 1024,
and could in certain setups cause problems with:
1) software that runs at boot time (e.g., old versions of LILO)
2) booting and partitioning software from other OSs
   (e.g., DOS FDISK, OS/2 FDISK)
Warning: invalid flag 0x0000 of partition table 4 will be corrected by w(rite)

Command (m for help): n
Command action
   e   extended
   p   primary partition (1-4)
p
Partition number (1-4): 1
First cylinder (1-1305, default 1):
Using default value 1
Last cylinder or +size or +sizeM or +sizeK (1-1305, default 1305):
Using default value 1305

Command (m for help): w
The partition table has been altered!

Calling ioctl() to re-read partition table.

WARNING: Re-reading the partition table failed with error 16: Device or resource busy.
The kernel still uses the old table.
The new table will be used at the next reboot.
Syncing disks.
[root@racnode1 dev]# fdisk sdc
Device contains neither a valid DOS partition table, nor Sun, SGI or OSF disklabel
Building a new DOS disklabel. Changes will remain in memory only,
until you decide to write them. After that, of course, the previous
content won't be recoverable.


The number of cylinders for this disk is set to 1305.
There is nothing wrong with that, but this is larger than 1024,
and could in certain setups cause problems with:
1) software that runs at boot time (e.g., old versions of LILO)
2) booting and partitioning software from other OSs
   (e.g., DOS FDISK, OS/2 FDISK)
Warning: invalid flag 0x0000 of partition table 4 will be corrected by w(rite)

Command (m for help): n
Command action
   e   extended
   p   primary partition (1-4)
p
Partition number (1-4): 1
First cylinder (1-1305, default 1):
Using default value 1
Last cylinder or +size or +sizeM or +sizeK (1-1305, default 1305):
Using default value 1305

Command (m for help): p

Disk sdc: 10.7 GB, 10737418240 bytes
255 heads, 63 sectors/track, 1305 cylinders
Units = cylinders of 16065 * 512 = 8225280 bytes

Device Boot      Start         End      Blocks   Id  System
  sdc1               1        1305    10482381   83  Linux

Command (m for help): w
The partition table has been altered!

Calling ioctl() to re-read partition table.

WARNING: Re-reading the partition table failed with error 16: Device or resource busy.
The kernel still uses the old table.
The new table will be used at the next reboot.
Syncing disks.
[root@racnode1 dev]# fdisk sdd
Device contains neither a valid DOS partition table, nor Sun, SGI or OSF disklabel
Building a new DOS disklabel. Changes will remain in memory only,
until you decide to write them. After that, of course, the previous
content won't be recoverable.


The number of cylinders for this disk is set to 1305.
There is nothing wrong with that, but this is larger than 1024,
and could in certain setups cause problems with:
1) software that runs at boot time (e.g., old versions of LILO)
2) booting and partitioning software from other OSs
   (e.g., DOS FDISK, OS/2 FDISK)
Warning: invalid flag 0x0000 of partition table 4 will be corrected by w(rite)

Command (m for help): n
Command action
   e   extended
   p   primary partition (1-4)
p
Partition number (1-4): 1
First cylinder (1-1305, default 1):
Using default value 1
Last cylinder or +size or +sizeM or +sizeK (1-1305, default 1305):
Using default value 1305

Command (m for help): w
The partition table has been altered!

Calling ioctl() to re-read partition table.
Syncing disks.
[root@racnode1 dev]# fdisk sde
Device contains neither a valid DOS partition table, nor Sun, SGI or OSF disklabel
Building a new DOS disklabel. Changes will remain in memory only,
until you decide to write them. After that, of course, the previous
content won't be recoverable.


The number of cylinders for this disk is set to 1305.
There is nothing wrong with that, but this is larger than 1024,
and could in certain setups cause problems with:
1) software that runs at boot time (e.g., old versions of LILO)
2) booting and partitioning software from other OSs
   (e.g., DOS FDISK, OS/2 FDISK)
Warning: invalid flag 0x0000 of partition table 4 will be corrected by w(rite)

Command (m for help): n
Command action
   e   extended
   p   primary partition (1-4)
1
Invalid partition number for type `1'
Command action
   e   extended
   p   primary partition (1-4)
p
Partition number (1-4): 1
First cylinder (1-1305, default 1):
Using default value 1
Last cylinder or +size or +sizeM or +sizeK (1-1305, default 1305):
Using default value 1305

Command (m for help): w
The partition table has been altered!

Calling ioctl() to re-read partition table.

WARNING: Re-reading the partition table failed with error 16: Device or resource busy.
The kernel still uses the old table.
The new table will be used at the next reboot.
Syncing disks.
[root@racnode1 dev]# fdisk sdf
Device contains neither a valid DOS partition table, nor Sun, SGI or OSF disklabel
Building a new DOS disklabel. Changes will remain in memory only,
until you decide to write them. After that, of course, the previous
content won't be recoverable.


The number of cylinders for this disk is set to 1305.
There is nothing wrong with that, but this is larger than 1024,
and could in certain setups cause problems with:
1) software that runs at boot time (e.g., old versions of LILO)
2) booting and partitioning software from other OSs
   (e.g., DOS FDISK, OS/2 FDISK)
Warning: invalid flag 0x0000 of partition table 4 will be corrected by w(rite)

Command (m for help): n
Command action
   e   extended
   p   primary partition (1-4)
p
Partition number (1-4): 1
First cylinder (1-1305, default 1):
Using default value 1
Last cylinder or +size or +sizeM or +sizeK (1-1305, default 1305):
Using default value 1305

Command (m for help): w
The partition table has been altered!

Calling ioctl() to re-read partition table.

WARNING: Re-reading the partition table failed with error 16: Device or resource busy.
The kernel still uses the old table.
The new table will be used at the next reboot.
Syncing disks.
>> Install additional oracle rpms
unixODBC-2.2.11-7.1
unixODBC-devel-2.2.11-7.1
libaio-devel-0.3.106-5
kernel-debug-2.6.18-238.el5
oracleasm-2.6.18-238.el5debug-2.0.5-1.el5
oracleasm-2.6.18-238.el5-2.0.5-1.el5
oracleasm-support-2.1.4-1.el5

rpm ivh package-name

#Verify the Installation
[root@racnode1 ~]# rpm -qa | grep unixODBC*
unixODBC-2.2.11-7.1
unixODBC-devel-2.2.11-7.1
[root@racnode1 ~]# rpm -qa | grep libaio*
libaio-devel-0.3.106-5
libaio-0.3.106-5
[root@racnode1 ~]# rpm -qa | grep oracleasm*
oracleasm-2.6.18-238.el5debug-2.0.5-1.el5
oracleasm-2.6.18-238.el5-2.0.5-1.el5
oracleasm-support-2.1.4-1.el5
[root@racnode1 ~]# rpm -qa | grep kernel-debug*
kernel-debug-2.6.18-238.el5
>> Configure ASM libraries on racnode1
root@racnode1 dev]# oracleasm configure -i
Configuring the Oracle ASM library driver.
This will configure the on-boot properties of the Oracle ASM library
driver. The following questions will determine whether the driver is
loaded on boot and what permissions it will have. The current values
will be shown in brackets ('[]'). Hittingwithout typing an
answer will keep that current value. Ctrl-C will abort.
Default user to own the driver interface []: ora11g
Default group to own the driver interface []: dba
Start Oracle ASM library driver on boot (y/n) [n]: y
Scan for Oracle ASM disks on boot (y/n) [y]: y
Writing Oracle ASM library driver configuration: done
[root@racnode1 dev]# /usr/sbin/oracleasm init
Creating /dev/oracleasm mount point: /dev/oracleasm
Loading module "oracleasm": oracleasm
Mounting ASMlib driver filesystem: /dev/oracleasm
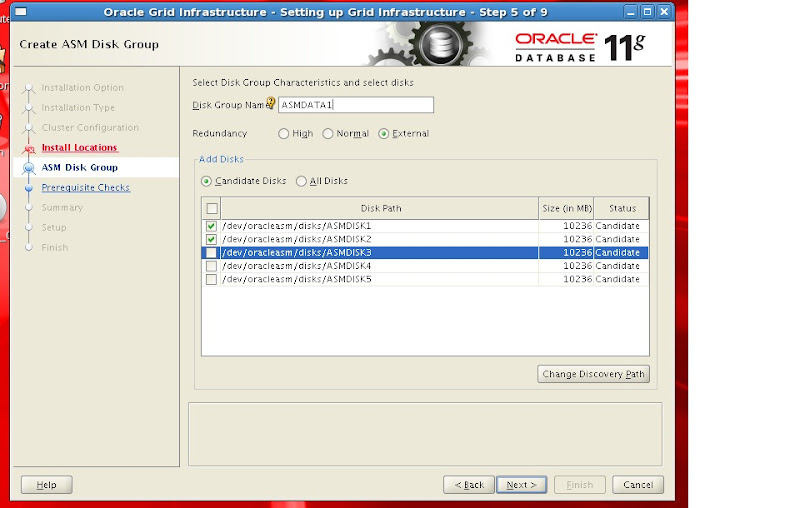
>> Create ASM Disks
[root@racnode1 dev]# oracleasm createdisk ASMDISK1 /dev/sdb1
Writing disk header: done
Instantiating disk: done
[root@racnode1 dev]# oracleasm createdisk ASMDISK2 /dev/sdc1
Writing disk header: done
Instantiating disk: done
[root@racnode1 dev]# oracleasm createdisk ASMDISK3 /dev/sdd1
Writing disk header: done
Instantiating disk: done
[root@racnode1 dev]# oracleasm createdisk ASMDISK4 /dev/sde1
Writing disk header: done
Instantiating disk: done
[root@racnode1 dev]# oracleasm createdisk ASMDISK5 /dev/sdf1
Writing disk header: done
Instantiating disk: done
[root@racnode1 dev]#
>> configure /etc/hosts file racnode1
# Do not remove the following line, or various programs
# that require network functionality will fail.
127.0.0.1               racnode1.orasol.com racnode1 localhost.localdomain localhost
192.168.1.101           racnode1.orasol.com             racnode1
192.168.1.102           racnode2.orasol.com             racnode2
192.168.1.103           racnode3.orasol.com             racnode3
192.168.1.104           racnode4.orasol.com             racnode4
#Private
10.10.1.1               racnode1-priv.orasol.com        racnode1-priv
10.10.1.2               racnode2-priv.orasol.com        racnode2-priv
10.10.1.3               racnode3-priv.orasol.com        racnode3-priv
10.10.1.4               racnode4-priv.orasol.com        racnode4-priv
#Virtual
192.168.1.201           racnode1-vip.orasol.com         racnode1-vip
192.168.1.202           racnode2-vip.orasol.com         racnode2-vip
192.168.1.203           racnode3-vip.orasol.com         racnode3-vip
192.168.1.204           racnode4-vip.orasol.com         racnode4-vip
#SCAN
192.168.1.301           racdb-scan.orasol.com           racdb-scan
>> configure kernel parameters (Edit /etc/sysctl.conf)
#All below are oracle RAC related kernel parameters
kernel.shmall = 268435456
fs.file-max = 6815744
kernel.shmmax = 4294967295
kernel.shmmni = 4096
#semaphores settings
kernel.sem = 250 32000 100 128
net.ipv4.ip_local_poer_range = 9000 65500
net.core.rmem_default = 262144
net.core.rmem_max = 4194304
net.core.wmem_default = 262144
net.core.wmem_max = 1048576
fs.aio-max-nr = 1048576
net.ipv4.ip_local_port_range = 9000 65500
>> Edit /etc/security/limits.conf
ora11g  soft    nproc   2047
ora11g  hard    nproc   16384
ora11g  soft    nofile  1024
ora11g  hard    nofile  65536
>> Disable service for NTP (Network time protocol)
# service ntpd stop
Shutting down ntpd:                                        [  OK  ]
# chkconfig ntpd off
# mv /etc/ntp.conf /etc/ntp.conf.org
>> Add OS group and user
[root@racnode1 ~]# groupadd dba
[root@racnode1 ~]# useradd -G dba ora11g
>> create Installation directories and change permissions
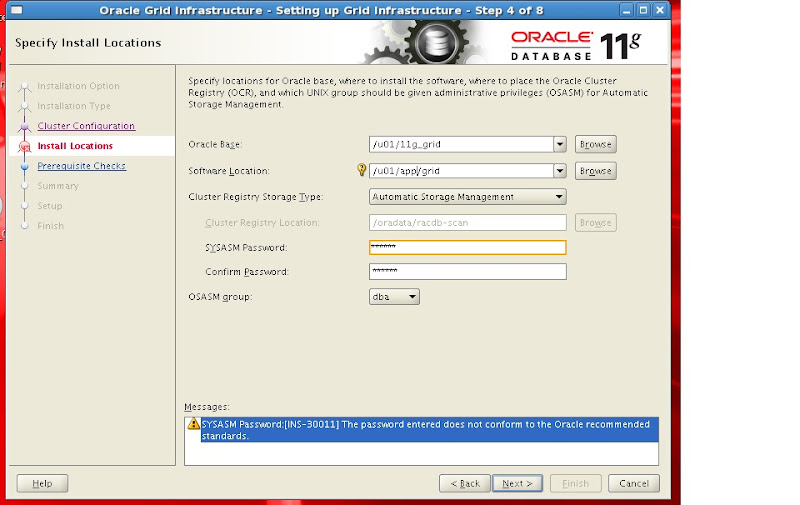
#Directories for grid Installation

[root@racnode1 ~]# mkdir -p  /u01/app
[root@racnode1 ~]# mkdir -p  /u01/11g_grid


#Directories for RDBMS oracle home Installation

[root@racnode1 ~]# mkdir -p  /u02/11g_db

[root@racnode1 ~]# chmod -R 775 /u01
[root@racnode1 ~]# chmod -R 775 /u02
[root@racnode1 ~]# chown -R ora11g:dba /u01
>> Verify Ethernet cards settings and hostname
>>> run "neat" command as root user

>>> configure eth1 with IP address 10.10.1.1 for private interconnect and deselect assign IP address with DHCP

>>> Verify dns settings and hostname

>> Now shutdown the virtual machine and copy all these Vrtual machine (racnode1) files to another virtual machine directories racnode2, racnode3 and racnode4 respectively.

>> After copying these files perfrom the below changes
Note: You can open this file using notepad
1)Rename racnode1.vmx to racnode2.vmx under racnode2 folder. Similarly rename files racnode3.vmx and racnode4.vmx from racnode1.vmx from their respective folders.
2) change the display name in racnode2.vmx, racnode3.vmx, racnode4.vmx in their respective vmware nodes configuration file.
displayName = "racnode2"
displayName = "racnode3"
displayName = "racnode4"
>> configure the hosts file and network settings on each node
Note: Disable IPV6, DHCP for eth0, eth1 on all nodes and deactivate and delete ethernet cards with name eth0.bak, eth1.bak
racnode2


/etc/hosts file:
# that require network functionality will fail.
127.0.0.1               racnode2.orasol.com racnode2    localhost
192.168.1.101           racnode1.orasol.com             racnode1
192.168.1.102           racnode2.orasol.com             racnode2
192.168.1.103           racnode3.orasol.com             racnode3
192.168.1.104           racnode4.orasol.com             racnode4
#Private
10.10.1.1               racnode1-priv.orasol.com        racnode1-priv
10.10.1.2               racnode2-priv.orasol.com        racnode2-priv
10.10.1.3               racnode3-priv.orasol.com        racnode3-priv
10.10.1.4               racnode4-priv.orasol.com        racnode4-priv
#Virtual
192.168.1.201           racnode1-vip.orasol.com         racnode1-vip
192.168.1.202           racnode2-vip.orasol.com         racnode2-vip
192.168.1.203           racnode3-vip.orasol.com         racnode3-vip
192.168.1.204           racnode4-vip.orasol.com         racnode4-vip
#SCAN
192.168.1.51            racdb-scan.orasol.com           racdb-scan
racnode3


/etc/hosts file:
# that require network functionality will fail.
127.0.0.1               racnode3.orasol.com racnode3    localhost
192.168.1.101           racnode1.orasol.com             racnode1
192.168.1.102           racnode2.orasol.com             racnode2
192.168.1.103           racnode3.orasol.com             racnode3
192.168.1.104           racnode4.orasol.com             racnode4
#Private
10.10.1.1               racnode1-priv.orasol.com        racnode1-priv
10.10.1.2               racnode2-priv.orasol.com        racnode2-priv
10.10.1.3               racnode3-priv.orasol.com        racnode3-priv
10.10.1.4               racnode4-priv.orasol.com        racnode4-priv
#Virtual
192.168.1.201           racnode1-vip.orasol.com         racnode1-vip
192.168.1.202           racnode2-vip.orasol.com         racnode2-vip
192.168.1.203           racnode3-vip.orasol.com         racnode3-vip
192.168.1.204           racnode4-vip.orasol.com         racnode4-vip
#SCAN
192.168.1.51            racdb-scan.orasol.com           racdb-scan
racnode4


[root@racnode4 ~]# more /etc/hosts
# Do not remove the following line, or various programs
# that require network functionality will fail.
127.0.0.1               racnode4.orasol.com racnode4    localhost
192.168.1.101           racnode1.orasol.com             racnode1
192.168.1.102           racnode2.orasol.com             racnode2
192.168.1.103           racnode3.orasol.com             racnode3
192.168.1.104           racnode4.orasol.com             racnode4
#Private
10.10.1.1               racnode1-priv.orasol.com        racnode1-priv
10.10.1.2               racnode2-priv.orasol.com        racnode2-priv
10.10.1.3               racnode3-priv.orasol.com        racnode3-priv
10.10.1.4               racnode4-priv.orasol.com        racnode4-priv
#Virtual
192.168.1.201           racnode1-vip.orasol.com         racnode1-vip
192.168.1.202           racnode2-vip.orasol.com         racnode2-vip
192.168.1.203           racnode3-vip.orasol.com         racnode3-vip
192.168.1.204           racnode4-vip.orasol.com         racnode4-vip
#SCAN
192.168.1.51            racdb-scan.orasol.com           racdb-scan
>> As this is testing RAC I am using SCAN IP in /etc/hosts file.
>> Save the network configuration and restart all nodes.
>> Now check NW connectivity between the all nodes
[root@racnode1 ~]# ping racnode1
PING racnode1.orasol.com (192.168.1.101) 56(84) bytes of data.
64 bytes from racnode1.orasol.com (192.168.1.101): icmp_seq=1 ttl=64 time=0.017 ms
64 bytes from racnode1.orasol.com (192.168.1.101): icmp_seq=2 ttl=64 time=0.034 ms

--- racnode1.orasol.com ping statistics ---
2 packets transmitted, 2 received, 0% packet loss, time 1000ms
rtt min/avg/max/mdev = 0.017/0.025/0.034/0.009 ms
[root@racnode1 ~]# ping racnode2
PING racnode2.orasol.com (192.168.1.102) 56(84) bytes of data.
64 bytes from racnode2.orasol.com (192.168.1.102): icmp_seq=1 ttl=64 time=0.212 ms
64 bytes from racnode2.orasol.com (192.168.1.102): icmp_seq=2 ttl=64 time=0.173 ms

--- racnode2.orasol.com ping statistics ---
2 packets transmitted, 2 received, 0% packet loss, time 999ms
rtt min/avg/max/mdev = 0.173/0.192/0.212/0.023 ms
[root@racnode1 ~]# ping racnode3
PING racnode3.orasol.com (192.168.1.103) 56(84) bytes of data.
64 bytes from racnode3.orasol.com (192.168.1.103): icmp_seq=1 ttl=64 time=1.31 ms
64 bytes from racnode3.orasol.com (192.168.1.103): icmp_seq=2 ttl=64 time=0.168 ms

--- racnode3.orasol.com ping statistics ---
2 packets transmitted, 2 received, 0% packet loss, time 1000ms
rtt min/avg/max/mdev = 0.168/0.740/1.312/0.572 ms
[root@racnode1 ~]# ping racnode4
PING racnode4.orasol.com (192.168.1.104) 56(84) bytes of data.
64 bytes from racnode4.orasol.com (192.168.1.104): icmp_seq=1 ttl=64 time=1.08 ms
64 bytes from racnode4.orasol.com (192.168.1.104): icmp_seq=2 ttl=64 time=0.222 ms
64 bytes from racnode4.orasol.com (192.168.1.104): icmp_seq=3 ttl=64 time=0.132 ms

--- racnode4.orasol.com ping statistics ---
3 packets transmitted, 3 received, 0% packet loss, time 2000ms
rtt min/avg/max/mdev = 0.132/0.479/1.085/0.430 ms
[root@racnode1 ~]#
>> Check similarly on all other nodes (racnode2, racnode3, racnode4)
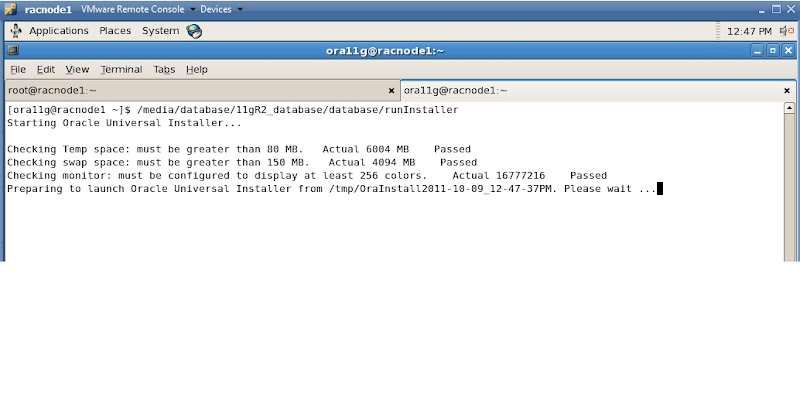
>> Mount the ISO image for 11.2.0.1 Grid Infrastructure and proceed with Installation.
>> Run xhost + as root user
>> login to ora11g account and excute run Installer
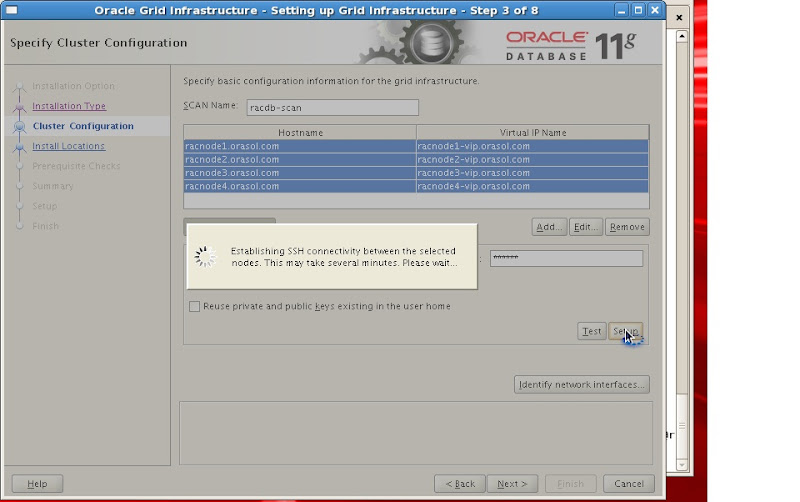
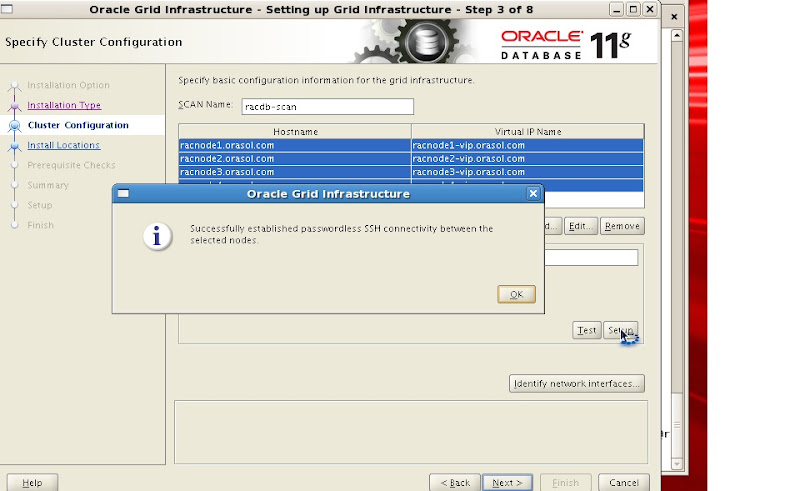
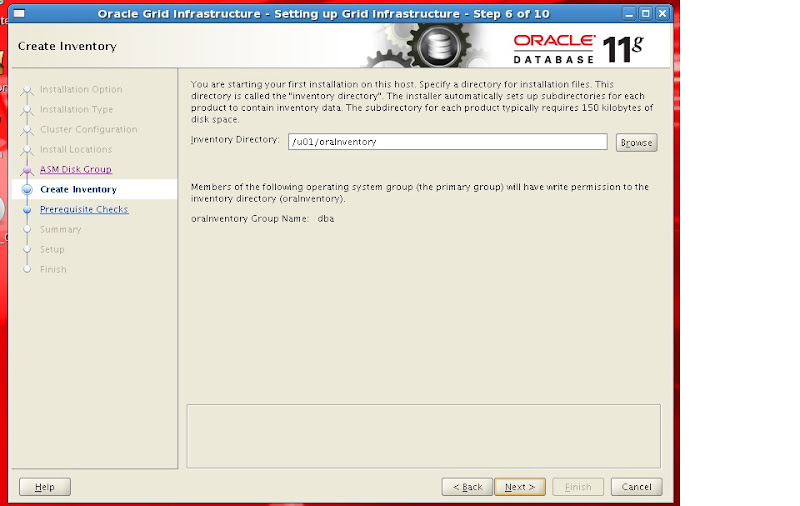
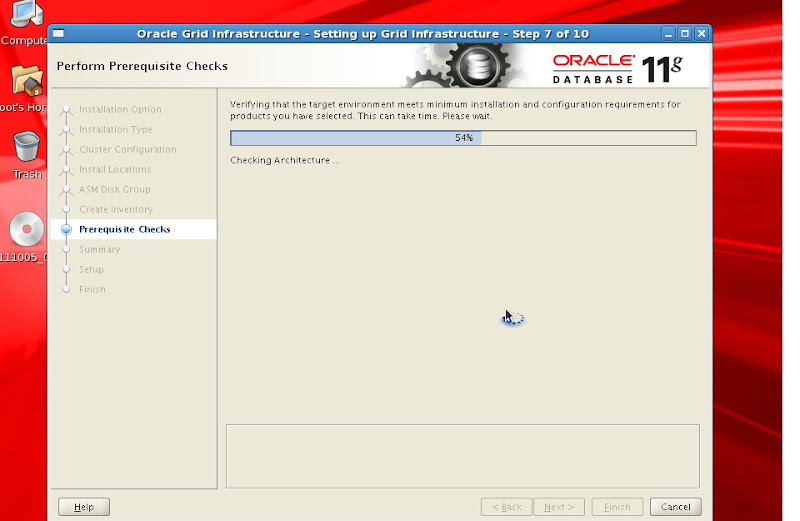
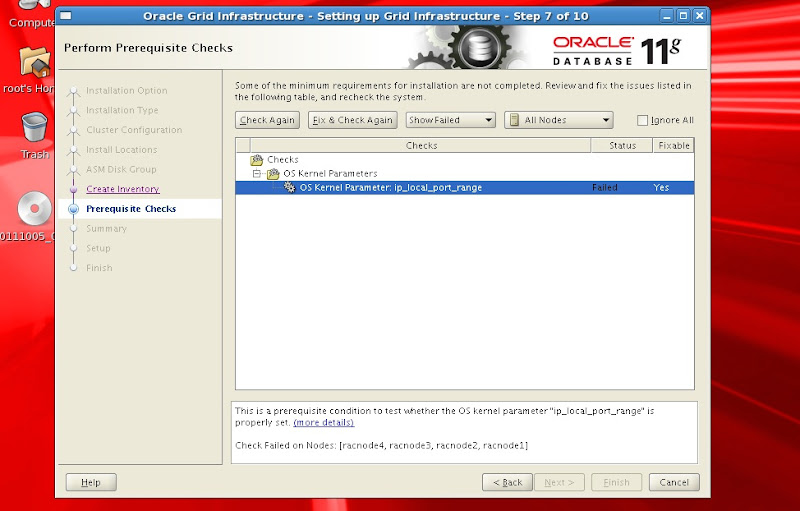
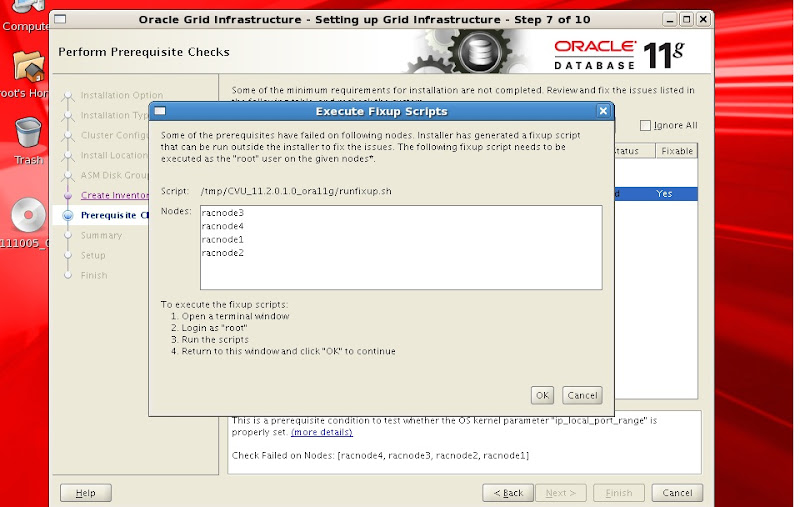
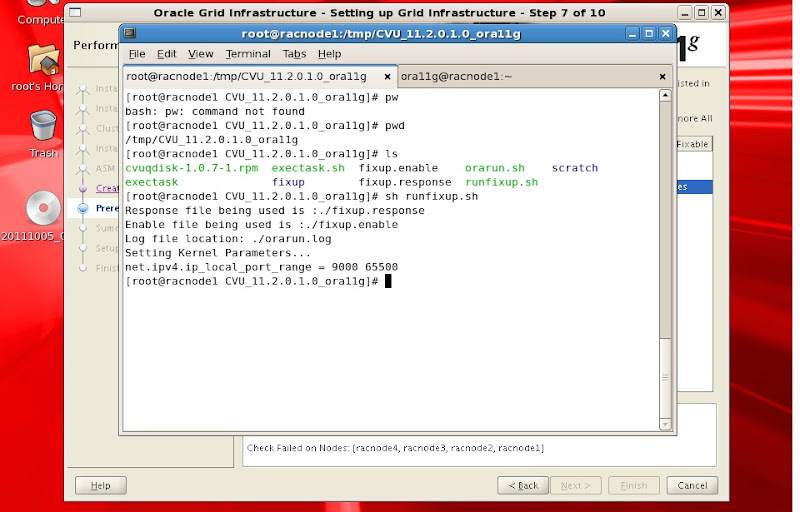
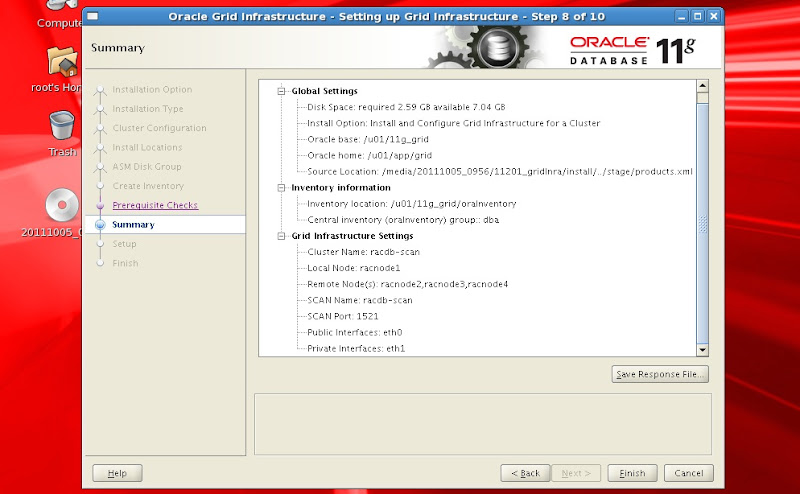
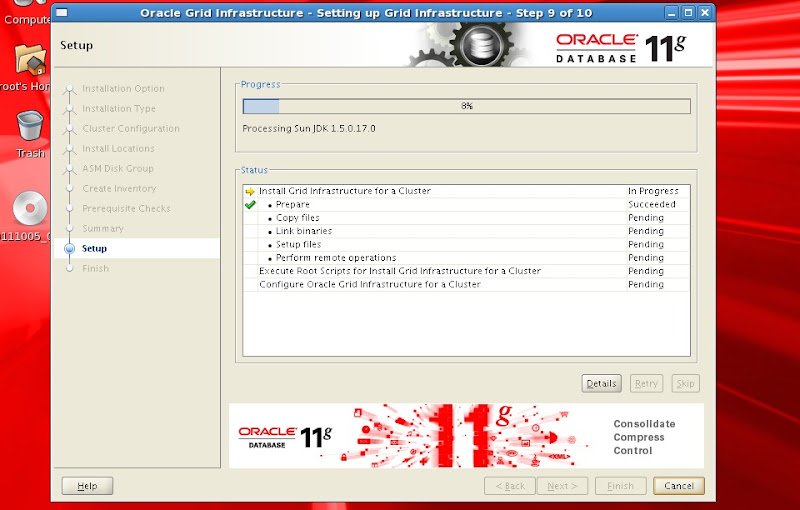
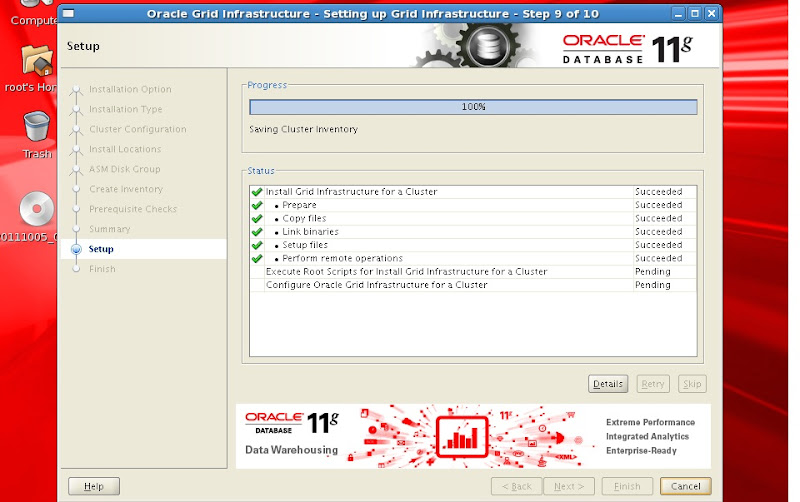
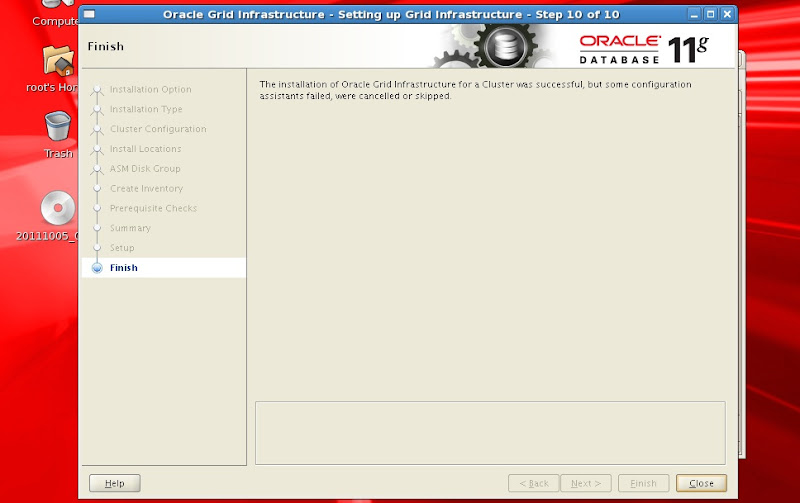
>> Screen shots for Grid infrastructure Installation


>> Run the script orainstRoot.sh on racnode1 first after running on it execute on racnode2, racnode3 and racnode4 individually.

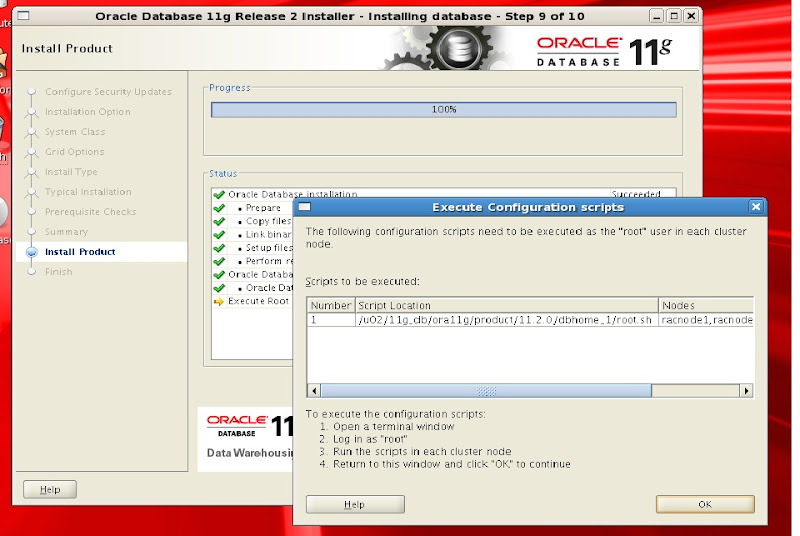
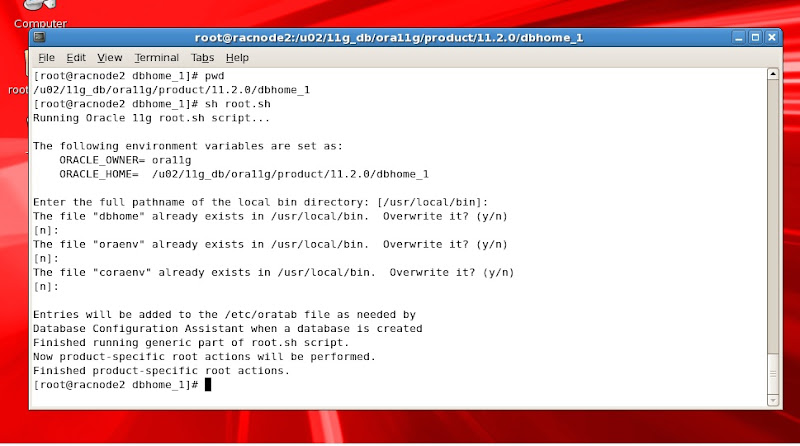
>> Similarly run root.sh first on racnode1
root@racnode1 grid]# sh root.sh
Running Oracle 11g root.sh script...

The following environment variables are set as:
    ORACLE_OWNER= ora11g
    ORACLE_HOME=  /u01/app/grid

Enter the full pathname of the local bin directory: [/usr/local/bin]:
   Copying dbhome to /usr/local/bin ...
   Copying oraenv to /usr/local/bin ...
   Copying coraenv to /usr/local/bin ...


Creating /etc/oratab file...
Entries will be added to the /etc/oratab file as needed by
Database Configuration Assistant when a database is created
Finished running generic part of root.sh script.
Now product-specific root actions will be performed.
2011-10-09 11:53:50: Parsing the host name
2011-10-09 11:53:50: Checking for super user privileges
2011-10-09 11:53:50: User has super user privileges
Using configuration parameter file: /u01/app/grid/crs/install/crsconfig_params
Creating trace directory
LOCAL ADD MODE
Creating OCR keys for user 'root', privgrp 'root'..
Operation successful.
  root wallet
  root wallet cert
  root cert export
  peer wallet
  profile reader wallet
  pa wallet
  peer wallet keys
  pa wallet keys
  peer cert request
  pa cert request
  peer cert
  pa cert
  peer root cert TP
  profile reader root cert TP
  pa root cert TP
  peer pa cert TP
  pa peer cert TP
  profile reader pa cert TP
  profile reader peer cert TP
  peer user cert
  pa user cert
Adding daemon to inittab
CRS-4123: Oracle High Availability Services has been started.
ohasd is starting
CRS-2672: Attempting to start 'ora.gipcd' on 'racnode1'
CRS-2672: Attempting to start 'ora.mdnsd' on 'racnode1'
CRS-2676: Start of 'ora.mdnsd' on 'racnode1' succeeded
CRS-2676: Start of 'ora.gipcd' on 'racnode1' succeeded
CRS-2672: Attempting to start 'ora.gpnpd' on 'racnode1'
CRS-2676: Start of 'ora.gpnpd' on 'racnode1' succeeded
CRS-2672: Attempting to start 'ora.cssdmonitor' on 'racnode1'
CRS-2676: Start of 'ora.cssdmonitor' on 'racnode1' succeeded
CRS-2672: Attempting to start 'ora.cssd' on 'racnode1'
CRS-2672: Attempting to start 'ora.diskmon' on 'racnode1'
CRS-2676: Start of 'ora.diskmon' on 'racnode1' succeeded
CRS-2676: Start of 'ora.cssd' on 'racnode1' succeeded
CRS-2672: Attempting to start 'ora.ctssd' on 'racnode1'
CRS-2676: Start of 'ora.ctssd' on 'racnode1' succeeded

ASM created and started successfully.

DiskGroup ASMDATA1 created successfully.

clscfg: -install mode specified
Successfully accumulated necessary OCR keys.
Creating OCR keys for user 'root', privgrp 'root'..
Operation successful.
CRS-2672: Attempting to start 'ora.crsd' on 'racnode1'
CRS-2676: Start of 'ora.crsd' on 'racnode1' succeeded
CRS-4256: Updating the profile
Successful addition of voting disk 4dea4d4330784fccbfeebe9e7d0ebd1e.
Successfully replaced voting disk group with +ASMDATA1.
CRS-4256: Updating the profile
CRS-4266: Voting file(s) successfully replaced
##  STATE    File Universal Id                File Name Disk group
--  -----    -----------------                --------- ---------
 1. ONLINE   4dea4d4330784fccbfeebe9e7d0ebd1e (/dev/oracleasm/disks/ASMDISK1) [ASMDATA1]
Located 1 voting disk(s).
CRS-2673: Attempting to stop 'ora.crsd' on 'racnode1'
CRS-2677: Stop of 'ora.crsd' on 'racnode1' succeeded
CRS-2673: Attempting to stop 'ora.asm' on 'racnode1'
CRS-2677: Stop of 'ora.asm' on 'racnode1' succeeded
CRS-2673: Attempting to stop 'ora.ctssd' on 'racnode1'
CRS-2677: Stop of 'ora.ctssd' on 'racnode1' succeeded
CRS-2673: Attempting to stop 'ora.cssdmonitor' on 'racnode1'
CRS-2677: Stop of 'ora.cssdmonitor' on 'racnode1' succeeded
CRS-2673: Attempting to stop 'ora.cssd' on 'racnode1'
CRS-2677: Stop of 'ora.cssd' on 'racnode1' succeeded
CRS-2673: Attempting to stop 'ora.gpnpd' on 'racnode1'
CRS-2677: Stop of 'ora.gpnpd' on 'racnode1' succeeded
CRS-2673: Attempting to stop 'ora.gipcd' on 'racnode1'
CRS-2677: Stop of 'ora.gipcd' on 'racnode1' succeeded
CRS-2673: Attempting to stop 'ora.mdnsd' on 'racnode1'
CRS-2677: Stop of 'ora.mdnsd' on 'racnode1' succeeded
CRS-2672: Attempting to start 'ora.mdnsd' on 'racnode1'
CRS-2676: Start of 'ora.mdnsd' on 'racnode1' succeeded
CRS-2672: Attempting to start 'ora.gipcd' on 'racnode1'
CRS-2676: Start of 'ora.gipcd' on 'racnode1' succeeded
CRS-2672: Attempting to start 'ora.gpnpd' on 'racnode1'
CRS-2676: Start of 'ora.gpnpd' on 'racnode1' succeeded
CRS-2672: Attempting to start 'ora.cssdmonitor' on 'racnode1'
CRS-2676: Start of 'ora.cssdmonitor' on 'racnode1' succeeded
CRS-2672: Attempting to start 'ora.cssd' on 'racnode1'
CRS-2672: Attempting to start 'ora.diskmon' on 'racnode1'
CRS-2676: Start of 'ora.diskmon' on 'racnode1' succeeded
CRS-2676: Start of 'ora.cssd' on 'racnode1' succeeded
CRS-2672: Attempting to start 'ora.ctssd' on 'racnode1'
CRS-2676: Start of 'ora.ctssd' on 'racnode1' succeeded
CRS-2672: Attempting to start 'ora.asm' on 'racnode1'
CRS-2676: Start of 'ora.asm' on 'racnode1' succeeded
CRS-2672: Attempting to start 'ora.crsd' on 'racnode1'
CRS-2676: Start of 'ora.crsd' on 'racnode1' succeeded
CRS-2672: Attempting to start 'ora.evmd' on 'racnode1'
CRS-2676: Start of 'ora.evmd' on 'racnode1' succeeded
CRS-2672: Attempting to start 'ora.asm' on 'racnode1'
CRS-2676: Start of 'ora.asm' on 'racnode1' succeeded
CRS-2672: Attempting to start 'ora.ASMDATA1.dg' on 'racnode1'
CRS-2676: Start of 'ora.ASMDATA1.dg' on 'racnode1' succeeded
CRS-2672: Attempting to start 'ora.registry.acfs' on 'racnode1'
CRS-2676: Start of 'ora.registry.acfs' on 'racnode1' succeeded

racnode1     2011/10/09 12:00:01     /u01/app/grid/cdata/racnode1/backup_20111009_120001.olr
Preparing packages for installation...
cvuqdisk-1.0.7-1
Configure Oracle Grid Infrastructure for a Cluster ... succeeded
Updating inventory properties for clusterware
Starting Oracle Universal Installer...

Checking swap space: must be greater than 500 MB.   Actual 4094 MB    Passed
The inventory pointer is located at /etc/oraInst.loc
The inventory is located at /u01/11g_grid/oraInventory
'UpdateNodeList' was successful.
[root@racnode1 grid]#
>> after successfull excution of orainstRoot.sh and root.sh on all nodes click ok


>> check the status of clusterware
[root@racnode1 bin]# ./crsctl status resource
NAME=ora.ASMDATA1.dg
TYPE=ora.diskgroup.type
TARGET=ONLINE            , ONLINE            , ONLINE            , ONLINE
STATE=ONLINE on racnode1, ONLINE on racnode2, ONLINE on racnode3, ONLINE on racnode4

NAME=ora.LISTENER.lsnr
TYPE=ora.listener.type
TARGET=ONLINE            , ONLINE            , ONLINE            , ONLINE
STATE=ONLINE on racnode1, ONLINE on racnode2, ONLINE on racnode3, ONLINE on racnode4

NAME=ora.LISTENER_SCAN1.lsnr
TYPE=ora.scan_listener.type
TARGET=ONLINE
STATE=ONLINE on racnode1

NAME=ora.asm
TYPE=ora.asm.type
TARGET=ONLINE            , ONLINE            , ONLINE            , ONLINE
STATE=ONLINE on racnode1, ONLINE on racnode2, ONLINE on racnode3, ONLINE on racnode4

NAME=ora.eons
TYPE=ora.eons.type
TARGET=ONLINE            , ONLINE            , ONLINE            , ONLINE
STATE=ONLINE on racnode1, ONLINE on racnode2, ONLINE on racnode3, ONLINE on racnode4

NAME=ora.gsd
TYPE=ora.gsd.type
TARGET=OFFLINE, OFFLINE, OFFLINE, OFFLINE
STATE=OFFLINE, OFFLINE, OFFLINE, OFFLINE

NAME=ora.net1.network
TYPE=ora.network.type
TARGET=ONLINE            , ONLINE            , ONLINE            , ONLINE
STATE=ONLINE on racnode1, ONLINE on racnode2, ONLINE on racnode3, ONLINE on racnode4

NAME=ora.oc4j
TYPE=ora.oc4j.type
TARGET=OFFLINE
STATE=OFFLINE

NAME=ora.ons
TYPE=ora.ons.type
TARGET=ONLINE            , ONLINE            , ONLINE            , ONLINE
STATE=ONLINE on racnode1, ONLINE on racnode2, ONLINE on racnode3, ONLINE on racnode4

NAME=ora.racnode1.vip
TYPE=ora.cluster_vip_net1.type
TARGET=ONLINE
STATE=ONLINE on racnode1

NAME=ora.racnode2.vip
TYPE=ora.cluster_vip_net1.type
TARGET=ONLINE
STATE=ONLINE on racnode2

NAME=ora.racnode3.vip
TYPE=ora.cluster_vip_net1.type
TARGET=ONLINE
STATE=ONLINE on racnode3

NAME=ora.racnode4.vip
TYPE=ora.cluster_vip_net1.type
TARGET=ONLINE
STATE=ONLINE on racnode4

NAME=ora.registry.acfs
TYPE=ora.registry.acfs.type
TARGET=ONLINE            , ONLINE            , ONLINE            , ONLINE
STATE=ONLINE on racnode1, ONLINE on racnode2, ONLINE on racnode3, ONLINE on racnode4

NAME=ora.scan1.vip
TYPE=ora.scan_vip.type
TARGET=ONLINE
STATE=ONLINE on racnode1
>> Eject the media for Grid Infra and mount ISO image for 11201 rdbms sw.
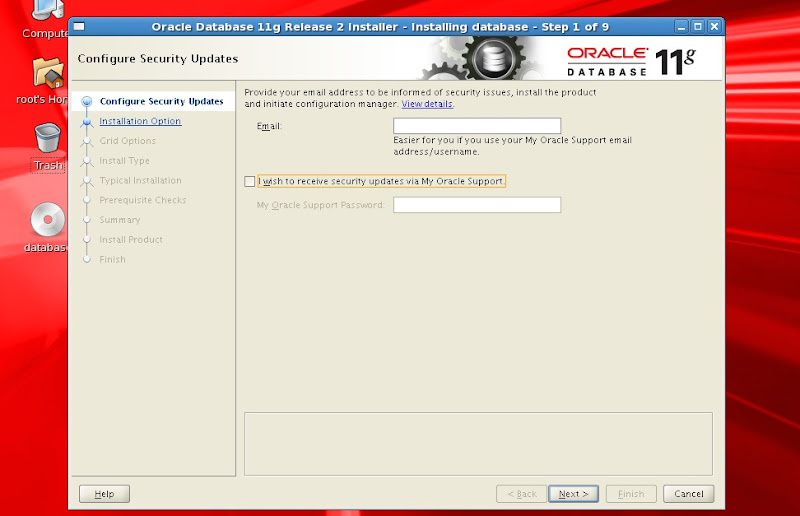
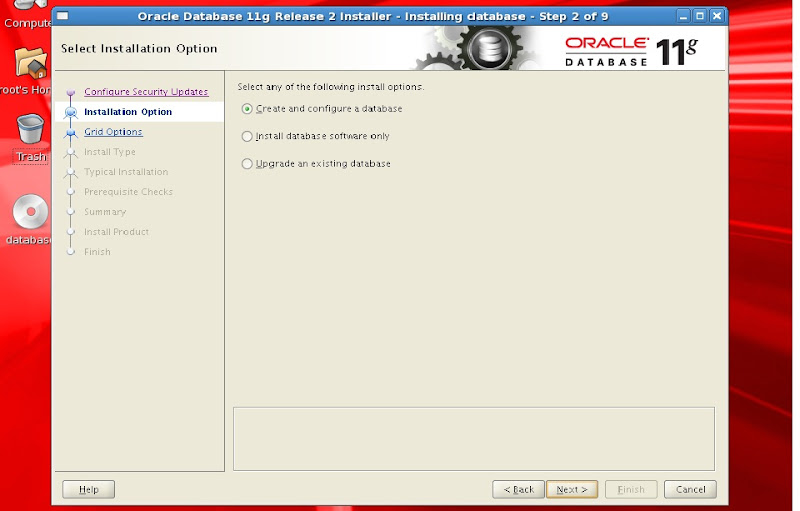
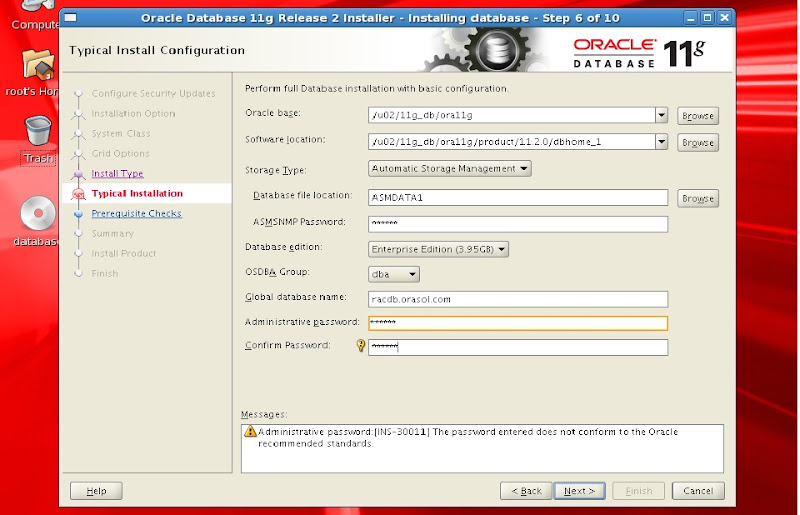
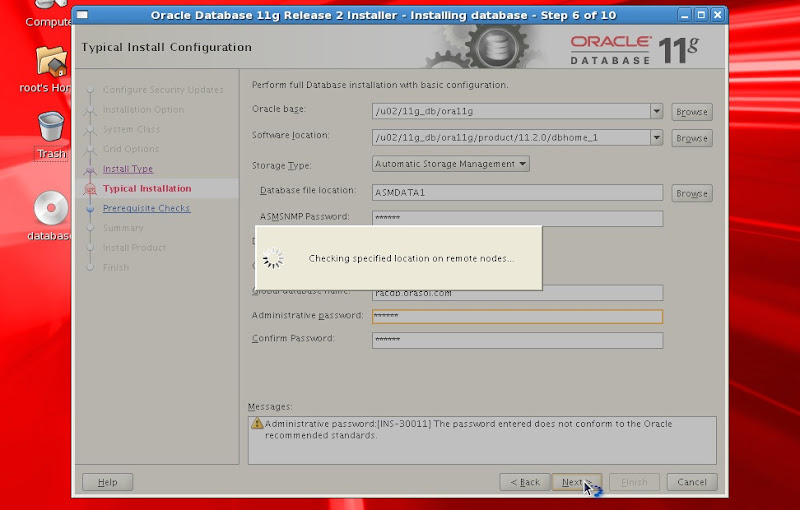
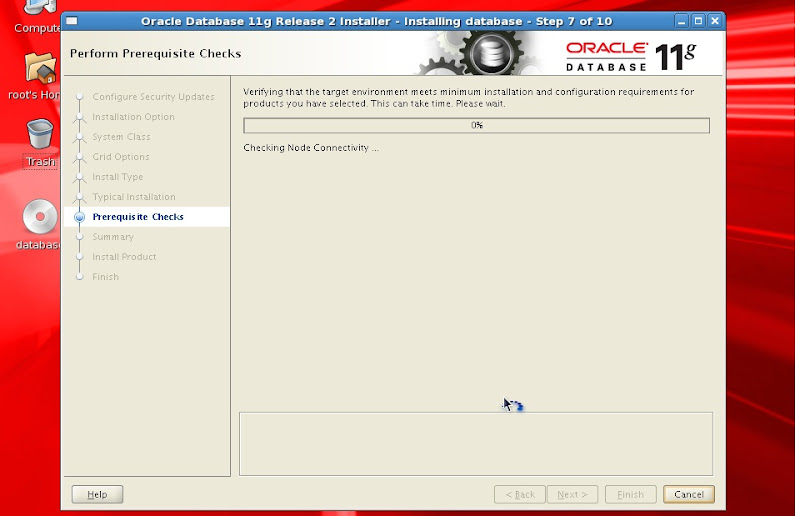
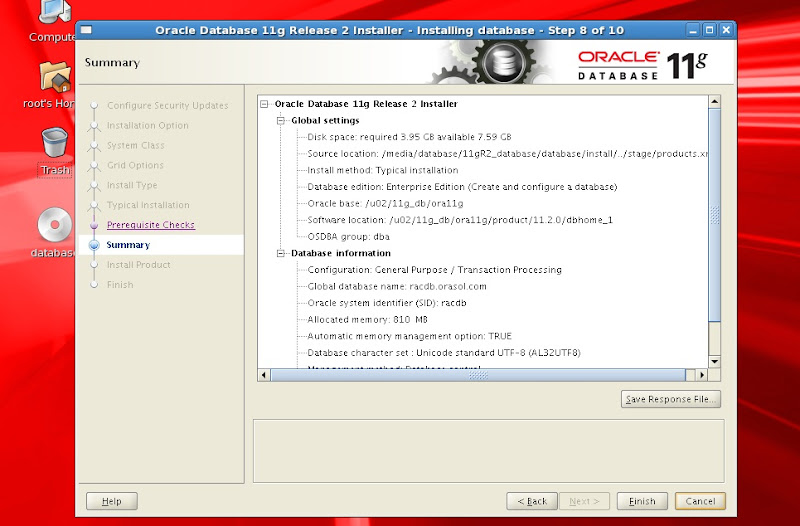
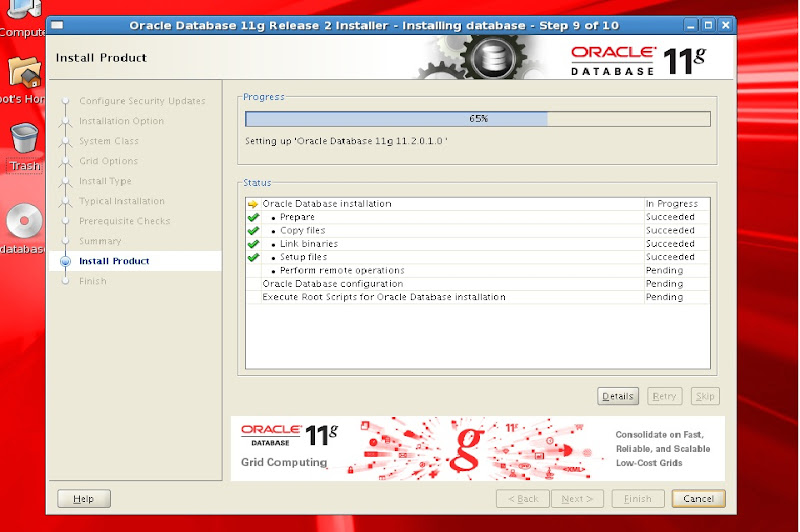
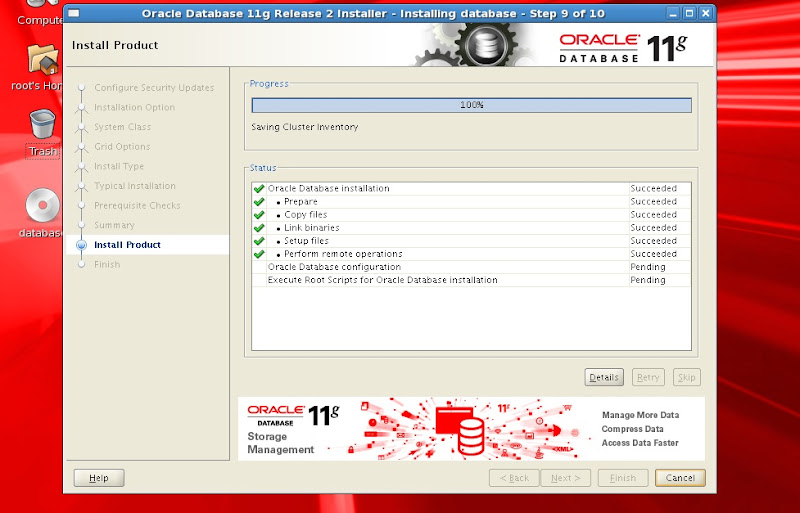
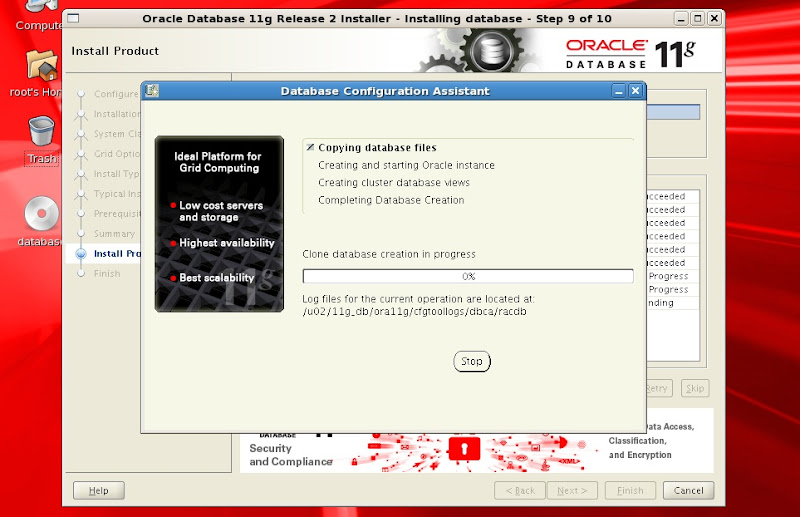
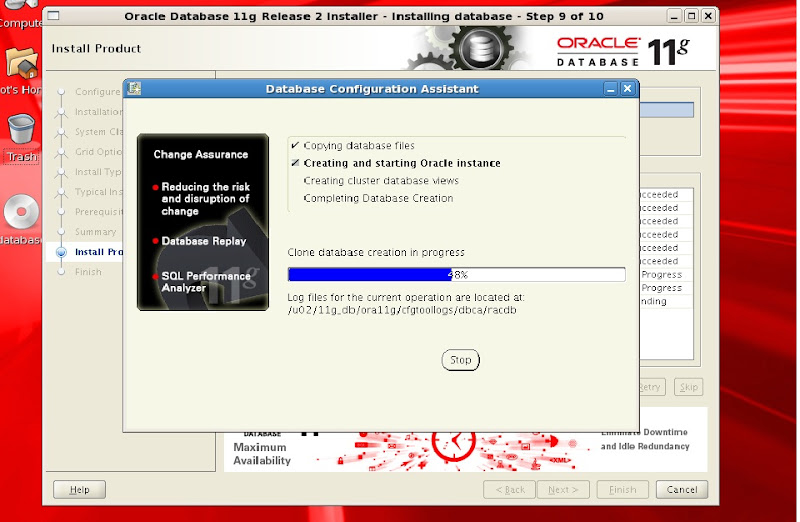
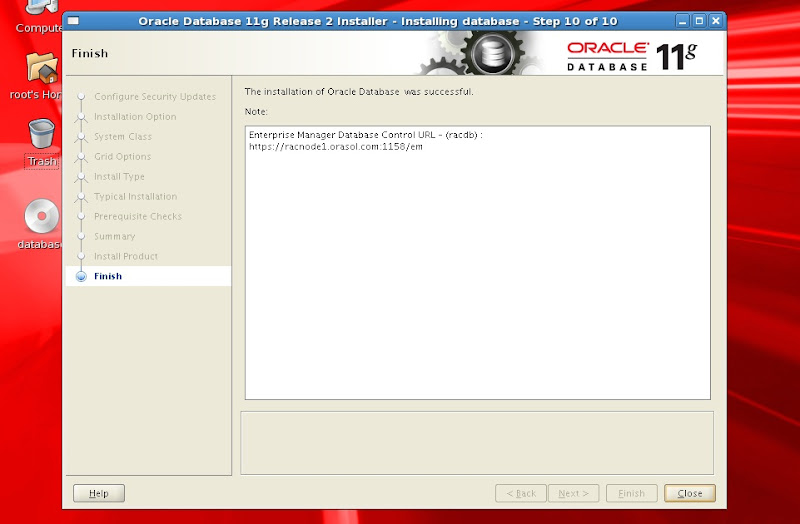
>> Screens for Oracle Sw and creation of RAC database


>> Add entries in the .bash_profile on all rac nodes
racnode1

ORACLE_SID=racdb1; export ORACLE_SID
ORACLE_HOME=/u02/11g_db/ora11g/product/11.2.0/dbhome_1; export ORACLE_HOME
GRID_HOME=/u01/app/grid; export GRID_HOME
PATH=$GRID_HOME/bin:$ORACLE_HOME/bin:$PATH; export PATH


racnode2

ORACLE_SID=racdb2; export ORACLE_SID
ORACLE_HOME=/u02/11g_db/ora11g/product/11.2.0/dbhome_1; export ORACLE_HOME
GRID_HOME=/u01/app/grid; export GRID_HOME
PATH=$GRID_HOME/bin:$ORACLE_HOME/bin:$PATH; export PATH

racnode3

ORACLE_SID=racdb3; export ORACLE_SID
ORACLE_HOME=/u02/11g_db/ora11g/product/11.2.0/dbhome_1; export ORACLE_HOME
GRID_HOME=/u01/app/grid; export GRID_HOME
PATH=$GRID_HOME/bin:$ORACLE_HOME/bin:$PATH; export PATH

racnode4

ORACLE_SID=racdb4; export ORACLE_SID
ORACLE_HOME=/u02/11g_db/ora11g/product/11.2.0/dbhome_1; export ORACLE_HOME
GRID_HOME=/u01/app/grid; export GRID_HOME
PATH=$GRID_HOME/bin:$ORACLE_HOME/bin:$PATH; export PATH
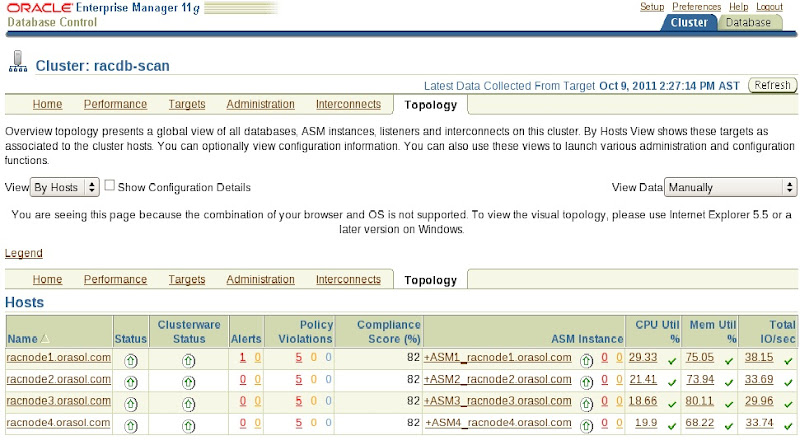
>> check the status of RACDB from any of the node
[ora11g@racnode2 ~]$ srvctl config database -d racdb
Database unique name: racdb
Database name: racdb
Oracle home: /u02/11g_db/ora11g/product/11.2.0/dbhome_1
Oracle user: ora11g
Spfile: +ASMDATA1/racdb/spfileracdb.ora
Domain: orasol.com
Start options: open
Stop options: immediate
Database role: PRIMARY
Management policy: AUTOMATIC
Server pools: racdb
Database instances: racdb1,racdb2,racdb3,racdb4
Disk Groups: ASMDATA1
Services:
Database is administrator managed
[ora11g@racnode2 ~]$ sqlplus / as sysdba

SQL*Plus: Release 11.2.0.1.0 Production on Wed Oct 12 15:21:50 2011

Copyright (c) 1982, 2009, Oracle.  All rights reserved.


Connected to:
Oracle Database 11g Enterprise Edition Release 11.2.0.1.0 - Production
With the Partitioning, Real Application Clusters, Automatic Storage Management, OLAP,
Data Mining and Real Application Testing options

SQL> select inst_name from v$active_instances;

INST_NAME
--------------------------------------------------------------------------------
racnode1.orasol.com:racdb1
racnode2.orasol.com:racdb2
racnode3.orasol.com:racdb3
racnode4.orasol.com:racdb4

SQL>
Thanks for visiting my blog !!!
Any comments and suggestions are highly appreciated.
Syed Zaheer


Comments
11gR2 RAC step by step preparation on vmware is wonderful.
This will be very much helpful for hands-on practise, exploring new features, working across multi-node RAC.
We really appreciate your dedication towards Oracle Technology.
would like to see further more on different areas of Oracle.
Regards,
M.A.Moazzam
thanks
Many thanks for your appreciation.
regards,
X A H E E R
1) Vmware Server 2.02 (32-bit)
2) oracle Enterprise Linux 5.6 (32-bit)
3) Oracle 11gR2 Grid infrastuture and database (11.2.0.1 - 32-bit)
Thanks for reading my blog.
Yes you can Install all listed above 32-bit software's on your 64-bit laptop.
regards,
X A H E E R
I am getting a error while running the roo.sh script for grid installation..
"Oracle High Availability Services startup failed."
Why I'm getting this error,
please help me......
Response file being used is :/tmp/CVU_11.2.0.1.0_oracle/fixup.response
Enable file being used is :/tmp/CVU_11.2.0.1.0_oracle/fixup.enable
Log file location: /tmp/CVU_11.2.0.1.0_oracle/orarun.log
Setting Kernel Parameters...
kernel.sem = 250 32000 100 128
fs.file-max = 6815744
net.ipv4.ip_local_port_range = 9000 65500
net.core.rmem_default = 262144
net.core.wmem_default = 262144
net.core.rmem_max = 4194304
net.core.wmem_max = 1048576
[root@racnode1 disks]# /disk1/oraInventory/orainstRoot.sh
Changing permissions of /disk1/oraInventory.
Adding read,write permissions for group.
Removing read,write,execute permissions for world.
Changing groupname of /disk1/oraInventory to oracle.
The execution of the script is complete.
[root@racnode1 disks]# /disk1/11g_grid/Grid/
bash: /disk1/11g_grid/Grid/: is a directory
[root@racnode1 disks]# /disk1/11g_grid/Grid/root.sh
Running Oracle 11g root.sh script...
The following environment variables are set as:
ORACLE_OWNER= oracle
ORACLE_HOME= /disk1/11g_grid/Grid
Enter the full pathname of the local bin directory: [/usr/local/bin]:
Copying dbhome to /usr/local/bin ...
Copying oraenv to /usr/local/bin ...
Copying coraenv to /usr/local/bin ...
Creating /etc/oratab file...
Entries will be added to the /etc/oratab file as needed by
Database Configuration Assistant when a database is created
Finished running generic part of root.sh script.
Now product-specific root actions will be performed.
2012-10-02 16:28:29: Parsing the host name
2012-10-02 16:28:29: Checking for super user privileges
2012-10-02 16:28:29: User has super user privileges
Using configuration parameter file: /disk1/11g_grid/Grid/crs/install/crsconfig_params
Creating trace directory
LOCAL ADD MODE
Creating OCR keys for user 'root', privgrp 'root'..
Operation successful.
root wallet
root wallet cert
root cert export
peer wallet
profile reader wallet
pa wallet
peer wallet keys
pa wallet keys
peer cert request
pa cert request
peer cert
pa cert
peer root cert TP
profile reader root cert TP
pa root cert TP
peer pa cert TP
pa peer cert TP
profile reader pa cert TP
profile reader peer cert TP
peer user cert
pa user cert
Adding daemon to inittab
CRS-4124: Oracle High Availability Services startup failed.
CRS-4000: Command Start failed, or completed with errors.
ohasd failed to start: Inappropriate ioctl for device
ohasd failed to start at /disk1/11g_grid/Grid/crs/install/rootcrs.pl line 443.
Seems problem with the permissions.
can you cross check whether this path exists:
/usr/local/bin/perl
Also updats me which version of GI you're using.
thanks,
X A H E E R
Just wondering if there was anything found on the error:
CRS-4124: Oracle High Availability Services startup failed.
CRS-4000: Command Start failed, or completed with errors.
ohasd failed to start: Inappropriate ioctl for device
ohasd failed to start at /disk1/11g_grid/Grid/crs/install/rootcrs.pl line 443.
I'm getting the exact same error.
I'm doing things slightly differently. I'm running VirtualBox 4.1 with OEL 6 and GI 11.2.0.1.
Perl is installed in my VM under /usr/bin/perl
Any help would be appreciated!
Thanks,
Matt
I was not able to find
kernel-debug-2.6.18-238.el5 and oracleasm-2.6.18-238.el5debug-2.0.5-1.el5
Any suggestions?
Thanks!
You can find these rpm's(kernel-debug-2.6.18-238.el5 and oracleasm-2.6.18-238.el5debug-2.0.5-1.el5) in O 5.6 DVD inside server directory.
thanks,
X A H E E R
thanks,
X A H E E R
I need to install Oracle 11gR2 RAC(2 node) in my laptop using VMware server & RHEL 6.Memory 6GB and Intel i3 CPU.Is this Possible?
Thanks in advance,
Sarathi
Prepare virtual machines with 2GB RAM each.
thanks,
X A H E E R
Regards,
Sarathi J
Your document is super sir,i installed Grid Infrastructure, everything is installed good sir but at end of the installation time it is asking to run the "root.sh".i ran the script in both nodes & in node1 script is running good but in node2 it's not running successfully please help me why it's throwing error.
regards,
X A H E E R
Happy New Year.
Sorry for late reply,The error message is
Enter the full pathname of the local bin directory: [/usr/local/bin]:
Copying dbhome to /usr/local/bin ...
Copying oraenv to /usr/local/bin ...
Copying coraenv to /usr/local/bin ...
Creating /etc/oratab file...
Entries will be added to the /etc/oratab file as needed by
Database Configuration Assistant when a database is created
Finished running generic part of root.sh script.
Now product-specific root actions will be performed.
2012-12-31 14:54:38: Parsing the host name
2012-12-31 14:54:38: Checking for super user privileges
2012-12-31 14:54:38: User has super user privileges
Using configuration parameter file: /u01/app/grid1/crs/install/crsconfig_params
Creating trace directory
LOCAL ADD MODE
Creating OCR keys for user 'root', privgrp 'root'..
Operation successful.
Adding daemon to inittab
CRS-4123: Oracle High Availability Services has been started.
ohasd is starting
CRS-4402: The CSS daemon was started in exclusive mode but found an active CSS daemon on node rac1, number 1, and is terminating
An active cluster was found during exclusive startup, restarting to join the cluster
CRS-2672: Attempting to start 'ora.mdnsd' on 'rac2'
CRS-2676: Start of 'ora.mdnsd' on 'rac2' succeeded
CRS-2672: Attempting to start 'ora.gipcd' on 'rac2'
CRS-2676: Start of 'ora.gipcd' on 'rac2' succeeded
CRS-2672: Attempting to start 'ora.gpnpd' on 'rac2'
CRS-2676: Start of 'ora.gpnpd' on 'rac2' succeeded
CRS-2672: Attempting to start 'ora.cssdmonitor' on 'rac2'
CRS-2676: Start of 'ora.cssdmonitor' on 'rac2' succeeded
CRS-2672: Attempting to start 'ora.cssd' on 'rac2'
CRS-2672: Attempting to start 'ora.diskmon' on 'rac2'
CRS-2676: Start of 'ora.diskmon' on 'rac2' succeeded
CRS-2676: Start of 'ora.cssd' on 'rac2' succeeded
CRS-2672: Attempting to start 'ora.ctssd' on 'rac2'
Start action for octssd aborted
CRS-2676: Start of 'ora.ctssd' on 'rac2' succeeded
CRS-2672: Attempting to start 'ora.drivers.acfs' on 'rac2'
CRS-2672: Attempting to start 'ora.asm' on 'rac2'
CRS-2676: Start of 'ora.drivers.acfs' on 'rac2' succeeded
CRS-2676: Start of 'ora.asm' on 'rac2' succeeded
CRS-2664: Resource 'ora.ctssd' is already running on 'rac2'
CRS-4000: Command Start failed, or completed with errors.
Command return code of 1 (256) from command: /u01/app/grid1/bin/crsctl start resource ora.asm -init
Start of resource "ora.asm -init" failed
Failed to start ASM
Failed to start Oracle Clusterware stack
[root@rac2 grid1]#
I have a question - why did you use 32 bit VMWare server while you have a laptop with 64 bit processing power? Was there any specific reason for not using 64 bit of VMWare? I have a desktop of 16GB RAM with 64 bit processing power. I am wondering whether I will be able tofollow your document if I install 64 bit VMWare?
Thanks for reading my blog. I've used 32-bit software's as i didn't had 64-bit media at that time when i performed this configuration.
You can go ahead with 64-bit software's you should not face any issues INSHALLAH.
You can contact me if you face any issues.
ALL the best.
regards,
Syed Zaheer
after installation grid is complete : execute root.sh
on node 1 (success)
on node 2 (fail)
CRS-2676: Start of 'ora.ctssd' on 'racnode2' succeeded
Disk Group ASMDATA1 already exists. Cannot be created again
Configuration of ASM failed, see logs for details
Did not succssfully configure and start ASM
CRS-2500: Cannot stop resource 'ora.crsd' as it is not running
CRS-4000: Command Stop failed, or completed with errors
cluster is not running
can you help me ?
I have question i do the same thing.but during the installation of grid while validating the SCAN IP i got the error unable to resolve the SCAN name..below is the details of etc hosts files
======================
127.0.0.1 racnode1.orasol.com racnode1 localhost.localdomain localhost
192.168.1.101 racnode1.orasol.com racnode1
192.168.1.102 racnode2.orasol.com racnode2
#Private
10.10.1.1 racnode1-priv.orasol.com racnode1-priv
10.10.1.2 racnode2-priv.orasol.com racnode2-priv
#Virtual
192.168.1.201 racnode1-vip.orasol.com racnode1-vip
192.168.1.202 racnode2-vip.orasol.com racnode2-vip
#SCAN
192.168.1.301 racdb-scan.orasol.com racdb-scan
Please try to change entry for loopback adapter as below on both the nodes:
127.0.0.1 localhost.localdomain localhost
thanks,
Syed Zaheer
Your posts is really helpful for me.Thanks for your wonderful post. I am very happy to read your post. It is really very helpful for us and I have gathered some important information from this blog.
Salesforce Training