Oracle 12c Grid Infrastructure Installation on Solaris 11 standalone
Step-By-Step actions:
1) Download software for Solaris X86-64 Bit architecture.
2) Configure OS perquisites.
3) Install Oracle 12c Grid Infrastructure software.
4) Install 12c RDBMS software and create database on ASM Storage.
Configuration of OS Pre-requistes:
- create OS user and group
- create directories for software and change permissions accordingly
- configure kernel parameters
- set proper display variable
- start Installation
- create OS user ad group
-
root@solaris11:~#groupadd dba
root@solaris11:~#useradd -g dba -d /export/home/ora12c -m ora12c
- create directory structure
root@solaris11:~#mkdir -p /ora1/grid    [GI Home]
root@solaris11:~#mkdir -p /ora1/ora12c   [RDBMS Home]
root@solaris11:~#chmod -R 775 /ora1/grid
root@solaris11:~#chown -R ora11g:dba /ora1/grid
root@solaris11:~#chmod -R 775 /ora1/ora12c
root@solaris11:~#chown -R ora11g:dba /ora1/ora12c
- configure kernel parameters:
root@solaris11:~# projadd ora12c
root@solaris11:~# cat /etc/user_attr
#
# The system provided entries are stored in different files
# under "/etc/user_attr.d".  They should not be copied to this file.
#
# Only local changes should be stored in this file.
# This line should be kept in this file or it will be overwritten.
#
root@solaris11:~# vi /etc/user_attr
root@solaris11:~# cat /etc/user_attr
#
# The system provided entries are stored in different files
# under "/etc/user_attr.d".  They should not be copied to this file.
#
# Only local changes should be stored in this file.
# This line should be kept in this file or it will be overwritten.
#
ora12c::::project=ora12c
root@solaris11:~#

- Add listed above entry in file /etx/user_attr
- login with ora12c user in other terminal and execute the following commands:
root@solaris11:~# prctl -n project.max-shm-memory -v 4gb -r -i project ora12c
root@solaris11:~# projmod -s -K "project.max-shm-memory=(priv,4gb,deny)" ora12c
root@solaris11:~#
root@solaris11:~# cat /etc/project
system:0::::
user.root:1::::
noproject:2::::
default:3::::
group.staff:10::::
ora11g:100::::project.max-shm-memory=(priv,4294967296,deny)
root@solaris11:~#
- Install package pkg://install/library/motif. If you do not Install this package runInstaller will not work
- Configure OS Disks
I have added 2 disks for 2 ASM diskgroups (1 - GI and 2 - DATA)
root@solaris11:~# format
Searching for disks...done


AVAILABLE DISK SELECTIONS:
       0. c7t0d0  (OS Disk)
          /pci@0,0/pci8086,2829@d/disk@0,0
       1. c7t2d0
          /pci@0,0/pci8086,2829@d/disk@2,0 ( GI Disk)
       2. c7t3d0
          /pci@0,0/pci8086,2829@d/disk@3,0  ( DATA Disk)
Specify disk (enter its number): 2
selecting c7t3d0
[disk formatted]
No Solaris fdisk partition found.


FORMAT MENU:
        disk       - select a disk
        type       - select (define) a disk type
        partition  - select (define) a partition table
        current    - describe the current disk
        format     - format and analyze the disk
        fdisk      - run the fdisk program
        repair     - repair a defective sector
        label      - write label to the disk
        analyze    - surface analysis
        defect     - defect list management
        backup     - search for backup labels
        verify     - read and display labels
        save       - save new disk/partition definitions
        inquiry    - show disk ID
        volname    - set 8-character volume name
        !     - execute , then return
        quit
format> p
WARNING - This disk may be in use by an application that has
   modified the fdisk table. Ensure that this disk is
   not currently in use before proceeding to use fdisk.
format> fdiks
`fdiks' is not expected.
format> fdisk
No fdisk table exists. The default partition for the disk is:

  a 100% "SOLARIS System" partition

Type "y" to accept the default partition,  otherwise type "n" to edit the
 partition table.
y
format> p


PARTITION MENU:
        0      - change `0' partition
        1      - change `1' partition
        2      - change `2' partition
        3      - change `3' partition
        4      - change `4' partition
        5      - change `5' partition
        6      - change `6' partition
        7      - change `7' partition
        select - select a predefined table
        modify - modify a predefined partition table
        name   - name the current table
        print  - display the current table
        label  - write partition map and label to the disk
        ! - execute , then return
        quit
partition> p
Current partition table (default):
Total disk cylinders available: 4344 + 2 (reserved cylinders)

Part      Tag    Flag     Cylinders        Size            Blocks
  0 unassigned    wm       0               0         (0/0/0)           0
  1 unassigned    wm       0               0         (0/0/0)           0
  2     backup    wu       0 - 4343       33.28GB    (4344/0/0) 69786360
  3 unassigned    wm       0               0         (0/0/0)           0
  4 unassigned    wm       0               0         (0/0/0)           0
  5 unassigned    wm       0               0         (0/0/0)           0
  6 unassigned    wm       0               0         (0/0/0)           0
  7 unassigned    wm       0               0         (0/0/0)           0
  8       boot    wu       0 -    0        7.84MB    (1/0/0)       16065
  9 unassigned    wm       0               0         (0/0/0)           0


partition> l

Ready to label disk, continue? Ready to label disk, continue? y

partition>

partition> p
Current partition table (original):
Total disk cylinders available: 4344 + 2 (reserved cylinders)

Part      Tag    Flag     Cylinders        Size            Blocks
  0 unassigned    wm       0               0         (0/0/0)           0
  1 unassigned    wm       0               0         (0/0/0)           0
  2     backup    wu       0 - 4343       33.28GB    (4344/0/0) 69786360
  3 unassigned    wm       0               0         (0/0/0)           0
  4 unassigned    wm       0               0         (0/0/0)           0
  5 unassigned    wm       0               0         (0/0/0)           0
  6 unassigned    wm       0               0         (0/0/0)           0
  7 unassigned    wm       0               0         (0/0/0)           0
  8       boot    wu       0 -    0        7.84MB    (1/0/0)       16065
  9 unassigned    wm       0               0         (0/0/0)           0

partition> 0
Part      Tag    Flag     Cylinders        Size            Blocks
  0 unassigned    wm       0               0         (0/0/0)           0

Enter partition id tag[unassigned]:
Enter partition permission flags[wm]:
Enter new starting cyl[0]: 10
Enter partition size[0b, 0c, 10e, 0.00mb, 0.00gb]: 33gb
partition> l
Ready to label disk, continue? y

partition>
=> Similarly format  another disk
=> change ownership of both the disks

root@solaris11:~#chown ora12c:dba /dev/rdsk/c7t2d0s0
root@solaris11:~#chown ora12c:dba /dev/rdsk/c7t3dos0

Make sure the ora12c is owner for these decives:

root@solaris11:/dev/rdsk# ls -lhL /dev/rdsk/c7t2d0s0
crw-r-----   1 ora12c   dba      206, 128 Aug 14 10:57 /dev/rdsk/c7t2d0s0
root@solaris11:/dev/rdsk# ls -lhL /dev/rdsk/c7t3d0s0
crw-r-----   1 ora12c   dba      206, 192 Aug 25 09:00 /dev/rdsk/c7t3d0s0
root@solaris11:/dev/rdsk#
- Configure the display variable:

- Start Installation of Oracle 12c Grid Infrastructure:
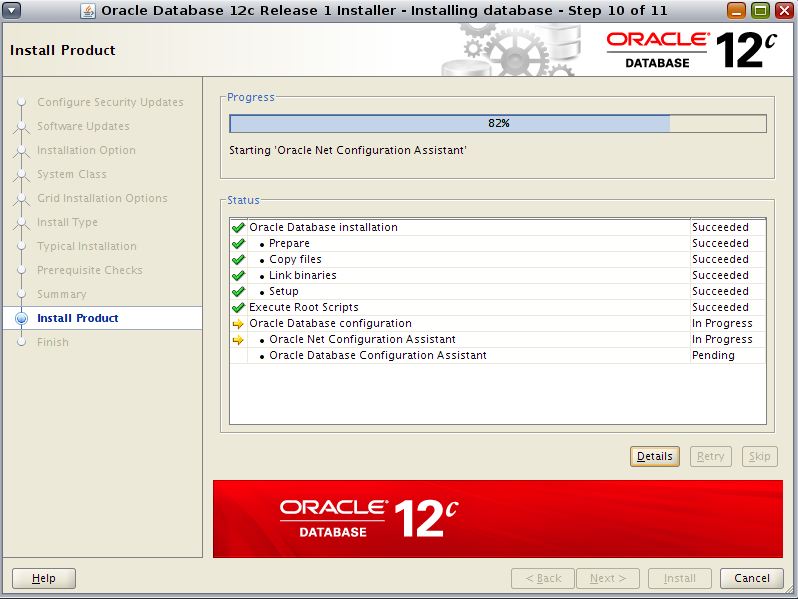
>> Follow the screenshots:


Installation of GRID Infrastructure completed successfully. Create additional diskgroup DATA for creating database.
Installation of 12c RDBMS Oracle Home and creation of database:
>> RunInstaller


Installation of 12c Grid Infrastructure and 12c RDBMS Installation with creation of database completed.
Thanks for reading.
regards,
X A H E E R


Comments
I would really appreciate if you can let us know more in detail the section where you added ASM disks.
Would you please let us know how, and using what procedure did you added these disks. People like me who would like to do such an installation and do not have access to SAN or NAS storage, so how can this be achieved by using ones local disk partitions...??
Thanks in advance... :-)